Rehearsal Take Recording That Sounds Like You

The take that changes a song is often not the polished final one. It is the rehearsal take recording where the band stops thinking about the red light, the vocalist tries a different phrasing, and the groove finally sits in the right place. Capturing that moment gives you more than a rough memo. It gives you evidence of what your music does when it is alive in the room.

For bands, artists and producers, recording rehearsals is one of the most useful habits you can build. It reveals whether a section genuinely lands, whether the tempo drifts, and whether everybody agrees on the arrangement. It also creates a library of honest performances that can inform a proper recording session, a live video or a release in its own right.

What makes rehearsal take recording worthwhile?

A mobile phone in the corner can be enough to remember a chord change. It is rarely enough to judge the performance. Vocals disappear, cymbals take over, bass becomes a soft blur and the loudest amp wins. That may be fine for a quick reminder, but it makes it difficult to hear the choices that matter.

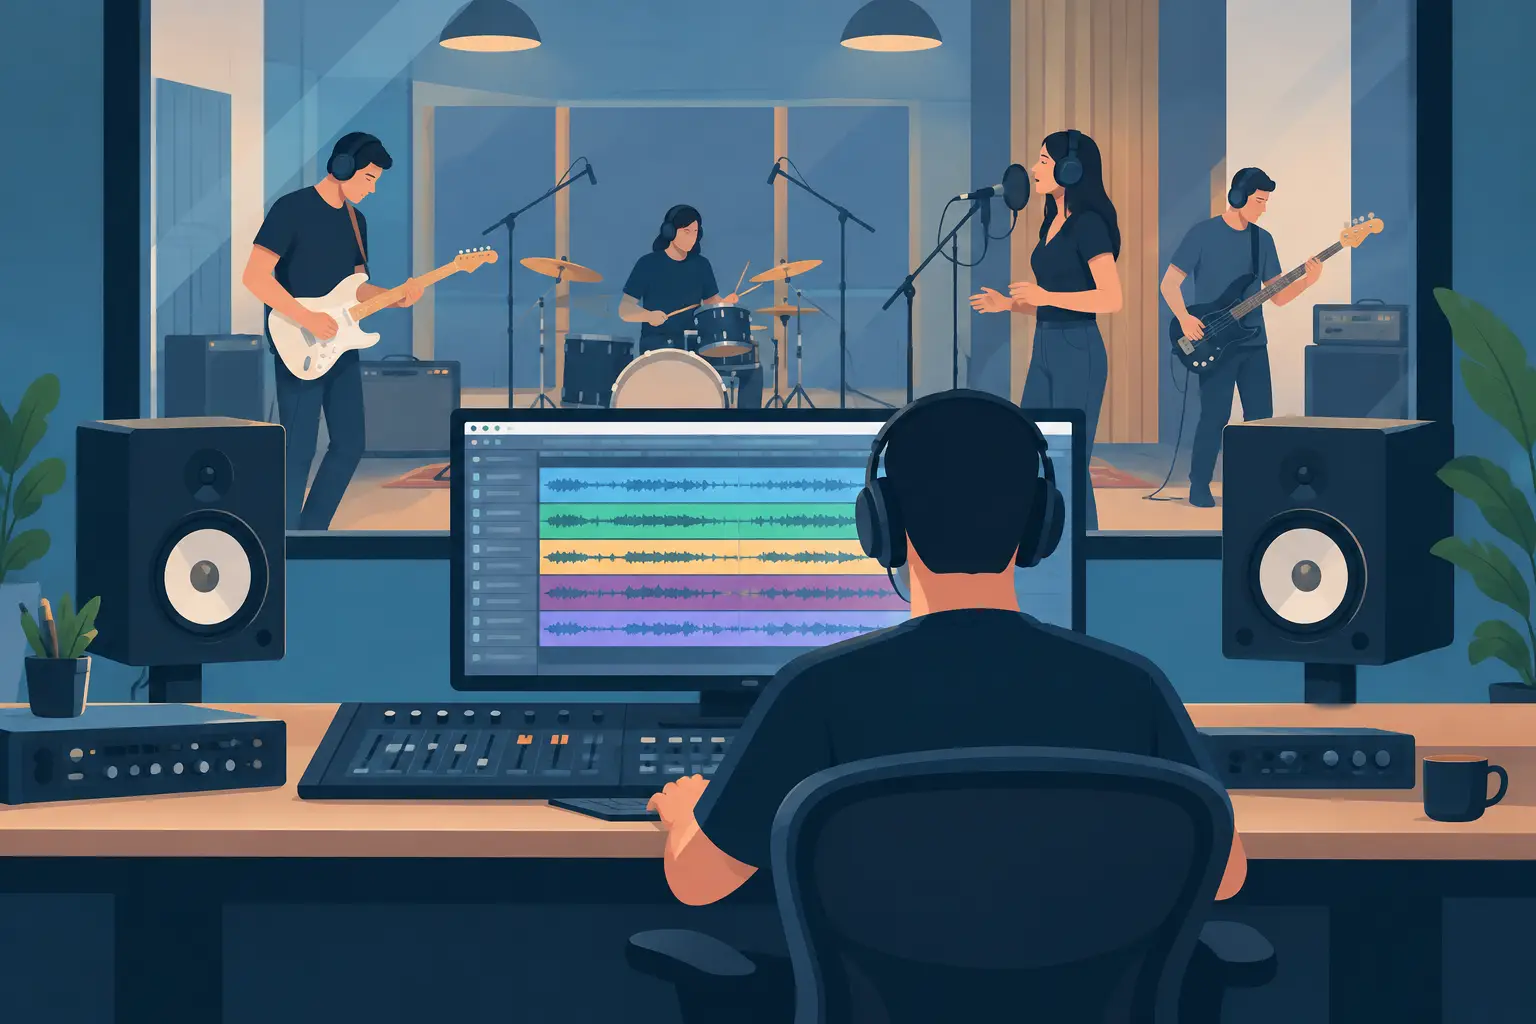
A multitrack rehearsal take recording gives each source its own space. Drums, bass, guitars, keys, lead vocal and backing vocals can be balanced afterwards rather than committed to one room sound. If a great chorus happens but the vocal is low, you can still hear it properly. If the drummer suggests a fill that changes the feel, you can isolate it and decide whether it serves the song.

The aim is not to turn every rehearsal into an expensive album session. The aim is to make the room useful. A well-captured rehearsal lets you practise with intent while keeping the option to develop the strongest material later.

Decide what the recording needs to answer

Before setting up microphones, agree on the purpose. This small conversation prevents a lot of wasted time. Are you checking arrangements, auditioning a new singer, preparing for a show, creating social content, or hoping to capture a performance that might be worth releasing?

An arrangement-focused session needs clarity. You want to hear starts, stops, dynamics and vocal cues. A performance-focused session may need more attention to sound, headphone mixes and repeatable takes. If the recording is for live video, the visual side matters too: tidy cables, considered lighting and enough room for cameras to move without distracting the players.

It depends on the project. A brand-new song may benefit from a fast, low-pressure capture after two run-throughs. A set intended for a live session may need proper soundcheck time and a plan for each song. Neither approach is more valid. Problems arise when a group expects release-ready results from a setup designed only for reference listening.

Build a rehearsal setup that keeps momentum

The best sessions preserve the natural pace of a rehearsal. Musicians should not spend forty minutes waiting while every tiny sound is polished. At the same time, a few practical choices at the start make the recording far more usable.

Keep the band hearing each other

Good monitoring is the foundation. If players cannot hear the vocal, the vocal gets pushed. If the drummer cannot hear the guitar rhythm, fills become guesswork. Place amplifiers and monitors so the group can communicate without turning everything up.

Headphones or in-ear monitoring can help when isolation is needed, especially for vocalists, but they are not compulsory for every rehearsal. Some bands perform better sharing the air in a live room. The trade-off is spill between microphones. Spill is not automatically bad. It can make a recording feel connected, provided the balance in the room is sensible.

Record separate tracks where possible

Separate tracks are your insurance policy. Record a direct input from bass alongside the bass amp, and consider a clean guitar feed where practical. Capture guide vocals even if the singer plans to redo them later. These choices give you flexibility without interrupting the performance.

For drums, the level of detail depends on the outcome. A simple kick, snare and overhead setup can document a rehearsal brilliantly. A fuller microphone setup offers more control for mixing and can support a release-quality result. More microphones are not always better, though. They take longer to position, and a poorly placed microphone creates more work than it saves.

Leave room for the first real take

Do not use all the energy on soundcheck. Once the balances feel right, play the song through. Many groups find that take one after setup has a charge that disappears when they start chasing perfection. Mark it clearly, even if you expect to improve it. Later, you may find it contains the most convincing vocal, a spontaneous ending or the exact tempo the song needs.

Make the performance easy to review

Recording is only half the job. A rehearsal take becomes valuable when you can find and assess it quickly. Name songs and takes clearly, and note anything unusual while it is fresh: “chorus stripped back”, “new middle eight”, “great ending”, or “tempo too fast”. A short voice note between takes can be enough.

When you listen back, resist the temptation to begin with technical flaws. Start with the song. Does the opening make you want to hear the next section? Does the chorus lift? Is there a point where attention falls away? Then move to the details: timing, tuning, lyric clarity and tone.

Try listening in three different ways. First, listen together in the studio while everyone remembers the room. Next, listen alone on ordinary speakers or headphones, where distractions fall away. Finally, return after a day or two. Distance makes it easier to distinguish a genuinely exciting take from one that merely felt good because the room was loud.

Know when a rehearsal recording is ready to go further

Some rehearsal takes should remain working documents. Their job is done if they helped you solve a transition, tighten a groove or prepare for the next session. Others have more potential.

A take is worth developing when it carries a complete performance rather than a collection of promising parts. The tempo feels intentional, the arrangement communicates, and the energy survives repeated listens. A few imperfections can be part of the character. Re-recording every element may improve precision while losing the interaction that made the take special.

This is where multitrack capture earns its place. You can edit an overlong count-in, balance the vocal, tidy a distracting noise, add a stronger overdub or mix the take for sharing without rebuilding the whole song. If it was filmed at the same time, you also have the basis for an authentic live-performance video rather than a mimed substitute.

At Yougig, that can mean rehearsing in a proper live room and choosing whether the session stays self-led or moves into engineer-led multitrack recording, multi-camera capture and post-production. The point is to match the setup to the ambition, not force every idea through the same process.

Common mistakes that flatten a good rehearsal take

The most common mistake is treating recording as an afterthought. A microphone placed wherever there is spare floor space will capture whatever happens to be loudest. Take five minutes to hear the room and place key sources deliberately.

Another is overplaying because the session is being recorded. Rehearsal recordings work when the group stays responsive. If everyone tries to perform at maximum intensity from bar one, the dynamics vanish. Leave space for the song to grow.

Finally, do not let endless playback replace rehearsal. Review a take, make a decision, then play again. The recording should support the work, not turn the room into a committee meeting.

The most useful rehearsal take is not necessarily flawless. It is the one that tells you what to do next: keep the loose first verse, rewrite the bridge, lower the key, slow the tempo, or book the time to capture that feeling properly before it disappears.
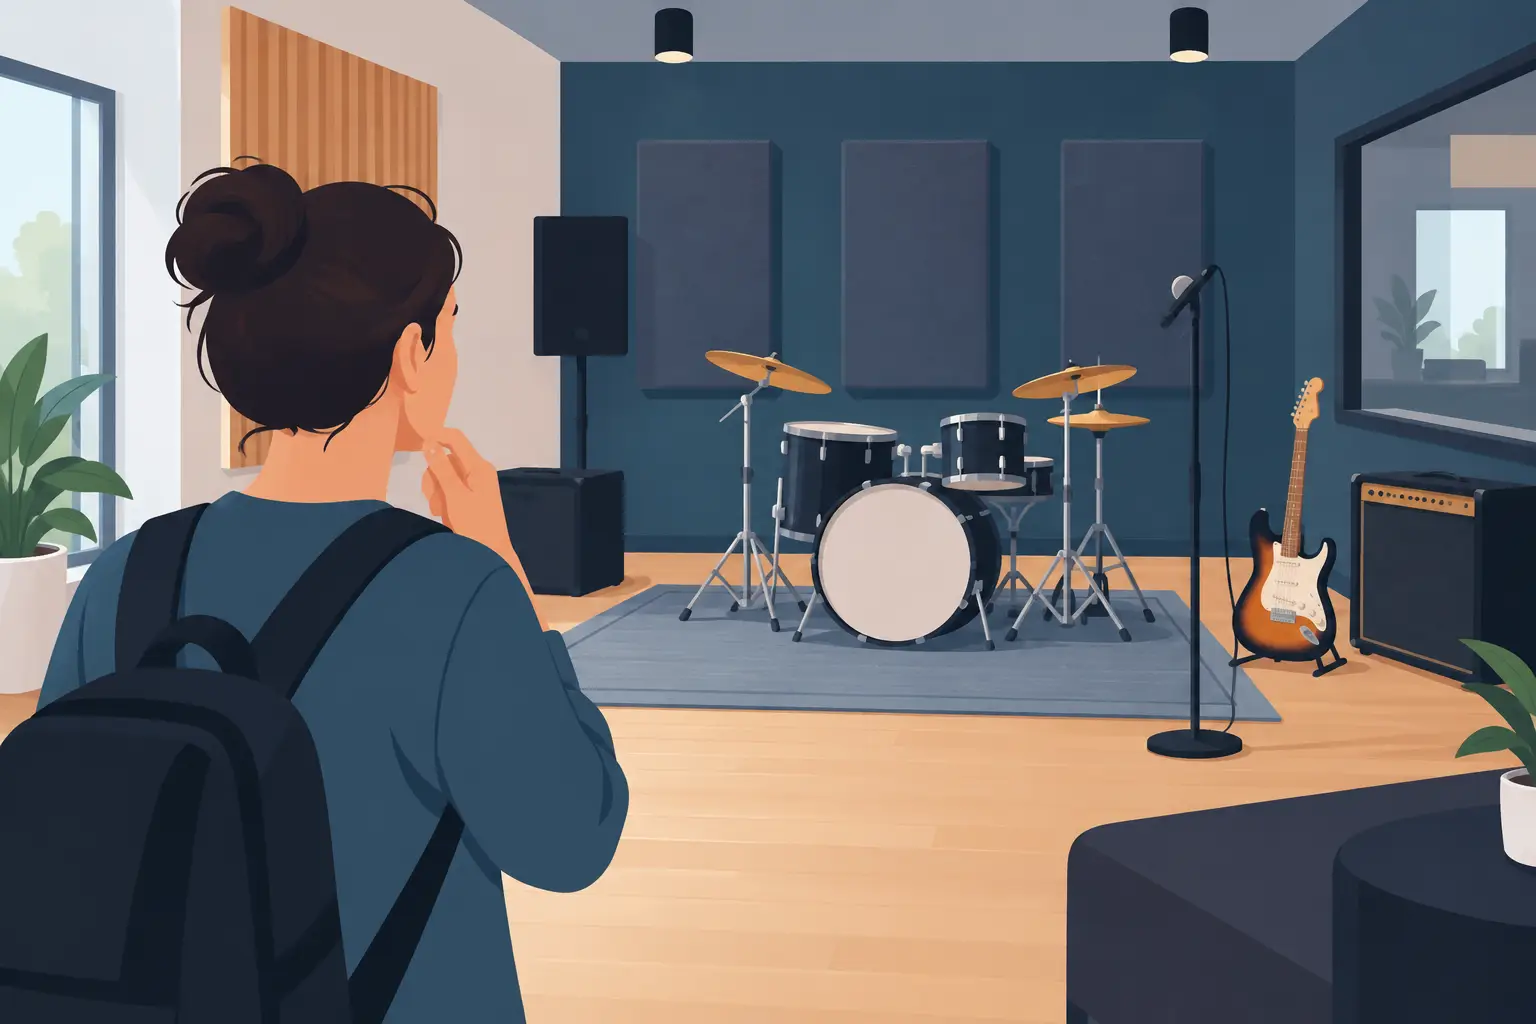

How to Choose a Rehearsal Studio That Works

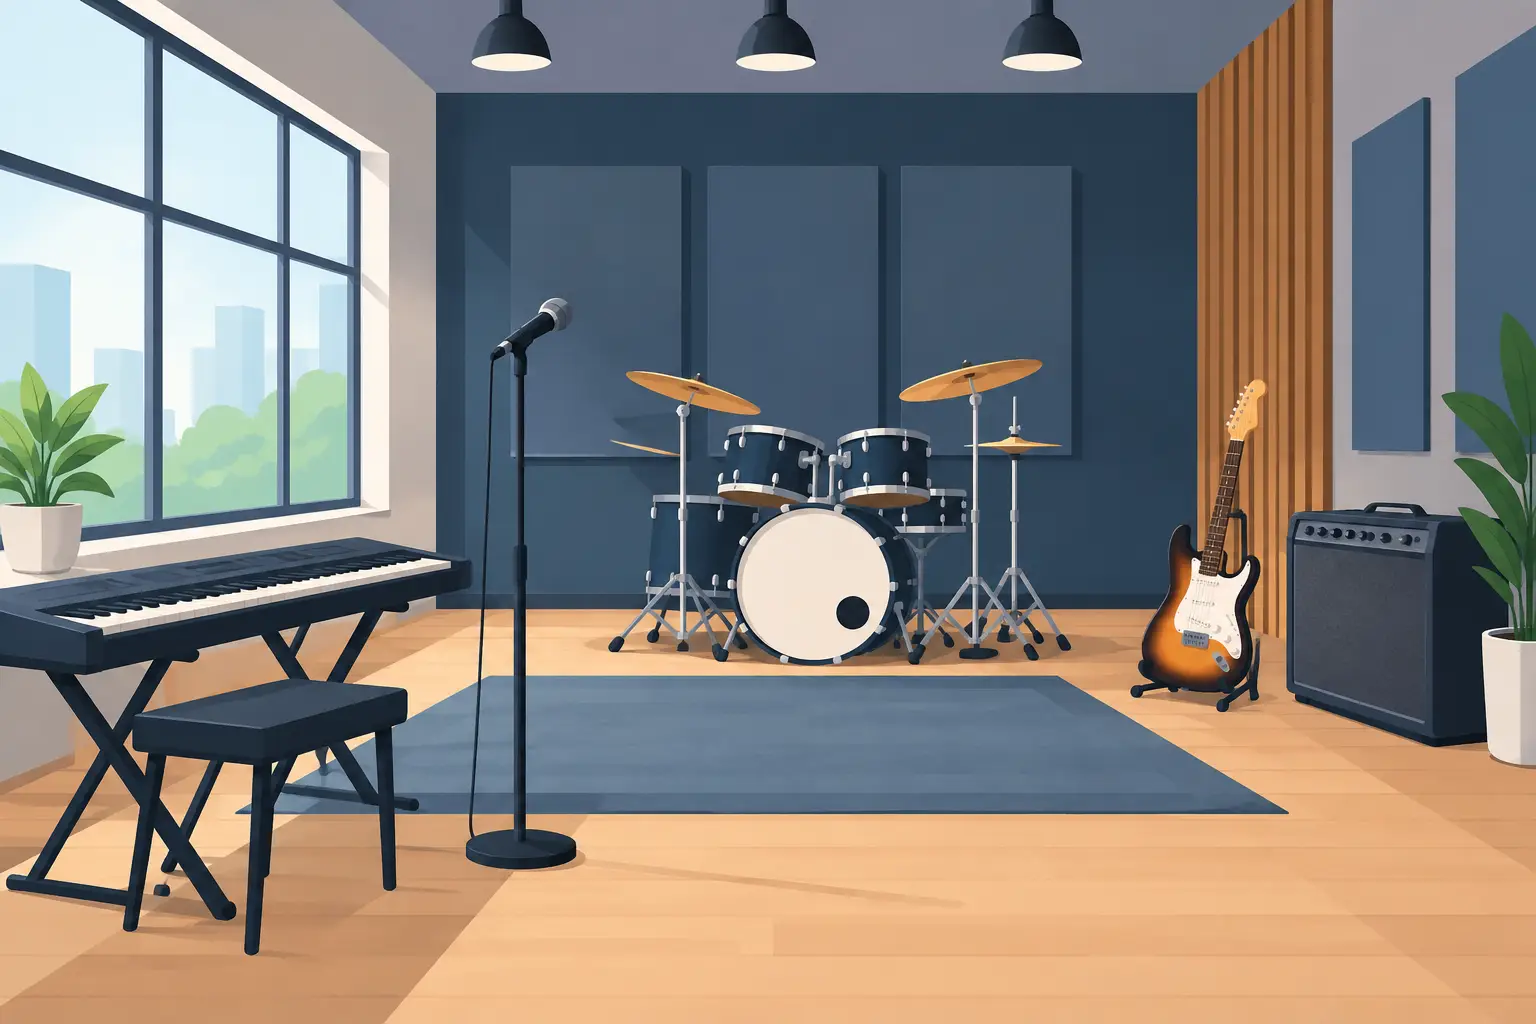
A rehearsal studio should do more than contain the volume. It should let a band arrive, plug in, settle quickly and spend its precious time playing rather than chasing a buzz, moving furniture or wondering whether the vocal can be heard. For a solo artist, rapper, beatbox performer or presenter, the same principle applies: the room needs to make the work feel possible.

The right space can change the shape of a session. Ideas hold together for longer. Arrangements become clearer. A rough chorus can turn into a performance worth recording. That is why choosing a rehearsal room is not simply about finding the lowest hourly price or the nearest postcode. It is about finding a reliable creative base that suits how you actually work.

Start with the session you need

Before comparing rooms, be honest about the purpose of the booking. A band preparing for a run of live dates needs different things from an artist developing new material, and both have different priorities from a creator filming a live session or a presenter rehearsing a piece to camera.

If you are rehearsing for the stage, focus on whether the space can handle your real-world setup. Can everyone play at performance volume without the drums swallowing the vocals? Is there enough room to stand as you will on stage, including pedalboards, stands, keys and instruments? A cramped room may be fine for writing, but it can give a false sense of how an arrangement will land in front of an audience.

For songwriting and pre-production, comfort and clarity often matter more than sheer size. You may want time to try a different tempo, rebuild a middle eight or work through harmonies without feeling rushed. A room that sounds balanced at a sensible volume is far more useful than one that encourages everyone to play harder just to hear themselves.

If there is even a chance you will want a polished recording or video later, ask what can happen in the same space. Moving a session to another location can break momentum. A rehearsal that can develop naturally into multitrack recording, live video capture or a filmed performance gives you more options without forcing you to commit before the song is ready.

What good rehearsal studio sound feels like

You do not need to be an acoustician to judge whether a room is working for you. Play together for ten minutes and listen to what is difficult. Are vocals disappearing? Does the kick drum blur into the bass? Do cymbals become harsh when the whole band comes in? Can the guitarist hear the difference between a useful tone and a louder one?

A well-considered rehearsal studio does not have to feel clinically silent. It should simply make it easier to hear the decisions that matter. You should be able to stop after a run-through and say, “the second verse needs less guitar”, rather than, “I could not hear the second verse at all”.

Room treatment, sensible speaker placement and adequate monitoring all play a part. So does the person setting up the session. An experienced engineer or studio owner can often solve a problem with a small adjustment to amplifier direction, drum positioning or monitor level. That kind of practical support is especially valuable when you are working on a tight schedule.

There is a trade-off, of course. A deliberately lively room can make a band feel exciting and immediate, while a more controlled space can reveal flaws with less mercy. Neither is automatically better. What matters is whether the room helps you rehearse honestly for the performance or recording you intend to make.

Volume is not the only measure

Many musicians look for a place where they can play loud. That matters, particularly for full bands, but useful volume is more than decibels. The best sessions have enough headroom for energy while still leaving space for detail.

Ask whether vocal microphones and PA are available, whether drum kit and backline can be provided if needed, and what you are expected to bring. Useful kit can make a rehearsal simpler and cheaper, particularly when several people are travelling from Brighton, Shoreham, London or further across Sussex. But supplied equipment is only helpful when it is maintained, clearly listed and appropriate for the room.

Check the practical details before you book

A good room can be undermined by a difficult arrival. If a four-piece band needs to carry instruments, stands and a drum breakable through awkward access, that needs to be known in advance. The same goes for parking, loading, session hours, noise restrictions and whether there is enough setup time within your booking.

Do not assume every studio works in the same way. Some rehearsal hire is self-service, which suits experienced acts who know exactly how they want to set up. Other sessions include technical help, and that can be the better value when you are recording, filming, livestreaming or trying an unfamiliar configuration.

It is worth asking a few direct questions before committing:

  • What is included in the hourly rehearsal rate, and what is charged separately?
  • Is the room available for the volume and duration your session requires?
  • Can you record a reference take, multitrack the session or add video if the performance comes together?
  • How much time should you allow for loading in, setup and packing down?

Clear answers prevent the awkward end-of-session scramble. They also let you budget properly. The cheapest room can become poor value if you spend half the booking setting up equipment, while a slightly more capable space may save money by making the session more focused.

Rehearsal, recording and video work better together

The line between rehearsal and production is often thinner than artists expect. A scratch vocal made during practice may capture the emotion missing from a later retake. A live arrangement can reveal its identity when the full band plays it in one room. A short performance video can give promoters, fans or collaborators a far better sense of a project than a phone clip from the corner of a rehearsal space.

That does not mean every practice needs to become a production day. Sometimes the right move is to leave the mics off and work through the difficult parts. But it helps to have the option to capture a moment when it arrives.

At Yougig, the live-room setting is designed around that flexibility: rehearsals can remain straightforward self-service sessions, while recording, multi-camera filming and livestream work can be planned with an engineer when the project calls for it. The surrounding waterfront setting also creates a useful contrast to the usual windowless rehearsal block. Step aboard, switch off the noise, then get on with the work.

For creators, this joined-up approach is particularly useful. A podcast host can rehearse delivery before recording an episode. A musician can track a live take, then move into editing and mixing. A presenter can use a green-screen setup for a focused piece to camera without trying to build a production space at home. Keeping these stages close together protects flow and reduces technical friction.

Choose a room that suits your people

The room is part of the atmosphere of a session. If your drummer feels policed, your singer cannot find a comfortable monitor level, or the person running the booking is impossible to reach, the group will notice. Creative work is exposed work. People perform better when the practical side feels calm, respectful and under control.

That does not mean you need constant intervention. Most artists value autonomy. The sweet spot is a space where you can take charge of your own rehearsal, with knowledgeable support nearby when a cable fails, a routing question arises or a recording plan needs shaping.

For newer acts, that support can shorten the learning curve without making anyone feel out of their depth. For established performers and commercial clients, it means confidence that the session will run professionally. The same standard matters whether you are preparing your first local set, recording a release, producing branded content or broadcasting to an audience beyond the room.

Book for momentum, not just availability

A single rehearsal can be useful. A regular slot can be transformative. When a group returns to a familiar room, setup gets faster, mix preferences become known and less energy is spent re-establishing the basics. That leaves more time for the things audiences actually notice: timing, dynamics, confidence and connection.

Still, routine should not become automatic. If the room no longer fits the project, move on. A duo adding electronic production may need better monitoring. A band heading into a video campaign may need space for cameras and lighting. An artist preparing an acoustic release may benefit from a quieter, more detailed recording environment. The best rehearsal studio is the one that fits the work in front of you, not the one you booked by habit.

Bring a clear goal to your next session, leave a little time for unexpected ideas, and choose a room where the practical details disappear into the background. When the space is right, rehearsal stops feeling like preparation for the real thing. It becomes where the real thing starts.

Mixing Turnaround Times and Your Release Date

A mix can be technically finished in a day and still not be ready to release. Mixing turnaround times are shaped less by a single clock than by the state of the recording, the ambition of the production, and how clearly everyone agrees on what “finished” sounds like.

For artists planning a single, a live session or a wider release campaign, that distinction matters. A realistic schedule protects the creative work, gives your ears time to reset and stops the final mix becoming a last-minute compromise made between artwork deadlines, distribution cut-offs and rehearsal nights.

Why mixing turnaround times vary

Mixing is where dozens, sometimes hundreds, of recorded decisions become one coherent record. A straightforward acoustic vocal and guitar performance with well-captured tracks may need only a focused mix session and a small round of amendments. A dense band production with layered guitars, programmed elements, vocal doubles, edits and live drums is a different proposition.

The starting point is crucial. Cleanly labelled multitracks, consolidated from the same bar or timestamp, allow a mixer to begin making musical decisions immediately. Files sent as scattered snippets, alternate takes or uncommitted effects can add preparation time before a fader is even moved.

Arrangement also affects pace. If the song is still asking whether the chorus needs another vocal, the bridge should be shorter, or a guitar part is fighting the lead line, those are production choices rather than mixing notes. They are worth making, but they should be allowed for honestly. A mix cannot solve an arrangement that has not yet decided what it wants to say.

Then there is the intended result. A raw, characterful live-band mix may benefit from speed and instinct. A modern pop, rap or electronic track often requires finer automation, vocal treatment and detailed low-end balancing. Neither approach is more valid. They simply need different amounts of attention.

A practical schedule for a release-ready mix

Rather than asking for an abstract turnaround, work backwards from the date the public will hear the track. Leave room after the mix for mastering, final approval, artwork checks, distribution delivery and any video or social content connected to the release.

For a simple, well-organised single, allow several working days from delivery of the files to a first mix. That gives the engineer time to listen properly rather than react at speed, and gives you time to hear the result away from the excitement of the session. More layered productions, EPs and albums need a longer runway, especially where tracks must feel consistent as a collection.

Revisions need their own place in the diary. A sensible plan is to expect a first mix, one organised feedback round, a revised version and a final check. If everyone is available and the notes are clear, this can move briskly. If a band of five people sends separate, conflicting messages over a week, the process naturally slows down.

Urgent mixes are sometimes possible, particularly when the tracks are prepared and the decisions are already clear. But rush work carries a trade-off. It may mean less time for alternative references, detailed automation or the valuable pause that lets both artist and engineer hear an issue with fresh perspective. A deadline can create focus. It should not remove the chance to listen.

Do not confuse mixing with mastering

A finished mix is not automatically a mastered release. Mixing balances and shapes the individual elements: drums, bass, vocals, instruments, effects and space. Mastering prepares the completed stereo mix for consistent playback and release, with a different listening perspective.

Build in time for both stages. Sending a mix to mastering at the last possible moment leaves little room if the master reveals a vocal level, harsh cymbal or bass balance issue that is better corrected in the mix itself.

How to give your mixer a brief that saves time

The clearest briefs are musical, specific and concise. “Make it sound professional” is understandable, but it does not tell an engineer whether you want close, dry vocals or a wider cinematic space; tight, controlled drums or something more open and energetic.

Start with the purpose of the track. Is it a streaming release, a live performance film, a podcast theme, a demo intended to win gigs, or a song designed for radio? The context helps establish what needs to lead and what can sit further back.

Reference tracks are useful when they explain a particular direction. Mention what you hear in them: perhaps the punch of the kick, the intimacy of the vocal, the width of the guitars or the restraint in the effects. Two or three references are usually more helpful than a playlist of twenty different records pulling in opposite directions.

It also helps to flag the non-negotiables before work begins. If a vocal comp is final, say so. If you love the distorted vocal throw at the end of the second verse, point it out. If an obvious tuning issue is intentional because it captures the performance, make that clear too. A good mix should preserve the character that made you keep the take.

Keep feedback musical and organised

The revision stage is where good momentum is either protected or lost. Listen to the first mix on more than one familiar system, but avoid changing your view every time you move from headphones to the car. Make notes, live with the mix for a little while, then send one consolidated response.

Useful feedback is tied to a moment and an outcome: “At 2:14, could the lead vocal feel more present when the drums return?” It gives the mixer a clear problem to solve while leaving room for their craft. Less useful feedback tends to prescribe a solution without identifying the issue, such as asking for “more EQ” or “more polished”.

When a group is involved, choose one person to gather notes. This does not mean one band member gets to overrule everyone else. It means the mixer receives a considered set of priorities rather than five versions of the same conversation. If opinions genuinely differ, identify the decision-maker before another revision round begins.

Know when a change is a revision and when it is new work

Small level moves, effect adjustments and automation refinements are normal mix revisions. Replacing a lead vocal, rebuilding a drum sound, adding newly written parts or changing the song structure can be a larger piece of production work. That is not a problem, but it may reset the schedule and should be discussed openly.

This is especially relevant when recording and mixing happen in separate sessions. If a new idea appears after the first mix, it may be exactly the improvement the song needs. Give it proper recording time, then return to the mix with the right files, rather than squeezing a major change into a quick amendment.

Build time into the recording session

The quickest mixes often begin with a well-run recording day. Great source sounds, confident performances and deliberate microphone choices reduce the need for repair later. If the snare already has the right crack in the live room, and the singer has heard a headphone balance that lets them perform naturally, the mix can concentrate on impact rather than rescue work.

That is one advantage of working with an engineer who understands the project from capture through to post-production. At Yougig, recording, multitrack editing, mixing and visual production can sit within the same creative workflow, so technical decisions made in the session can support the final release rather than create avoidable questions later.

Still, no studio should promise that every track has the same timetable. A stripped-back live take may be complete quickly because its energy lies in the performance. An ambitious release with detailed vocal production may deserve more space. The useful question is not “How fast can this be mixed?” but “What does this song need before it represents us properly?”

Leave a little air around the end of the process. The right mix is often recognised not because every detail is louder, brighter or more complicated, but because the song holds together wherever someone presses play.

How to Record Presenter Videos That Feel Natural

A presenter can have the right message, a strong product and a useful point of view, then lose the audience in the first ten seconds because the sound is thin, the lighting is harsh or the delivery feels read rather than spoken. Learning how to record presenter videos is less about looking like a television studio and more about removing the friction that makes someone seem uncomfortable on camera.

A good presenter film creates a direct connection. The viewer should feel that the speaker is talking to them, not performing at a lens in a room full of kit. That calls for a little planning, careful technical choices and enough time for the presenter to settle into their own rhythm.

Start with the message, not the camera

The most polished camera setup cannot rescue a vague video. Before choosing a backdrop or switching on a light, decide what the viewer should know, feel or do once the film ends. Keep that outcome narrow. A two-minute introduction to a service needs one clear takeaway, whereas a training video may need three practical steps and a demonstration.

Write for speech rather than for a page. Sentences that read beautifully can sound stiff when spoken. Use short phrases, everyday language and natural pauses. It helps to mark the script where a new idea begins, where a visual will appear, and where the presenter can breathe. If a line feels awkward in rehearsal, rewrite it. Do not ask the presenter to force their way through copy that no one would say aloud.

A full script suits legal, technical or tightly timed information. For interviews, welcome videos and thought-leadership pieces, a bullet-point outline often gives a better result. It leaves room for personality, which is usually why the audience is watching in the first place.

How to record presenter videos with a reliable setup

For most presenter-led productions, the essentials are straightforward: clean audio, soft controlled light, an intentional background and stable framing. Spend your budget and preparation time in that order. Viewers are often forgiving of an image that is not cinema-perfect; they are much less patient with echo, hiss, traffic noise or a voice that drops in level.

Prioritise sound from the start

A clip-on lavalier microphone is discreet and effective for a presenter who moves or demonstrates products. Position it around a hand-width below the mouth, keeping it clear of necklaces, scarves and loose clothing that can rub against the capsule. A boom microphone just out of frame can sound more open, but it needs a controlled space and careful placement.

Always monitor through headphones while recording. A meter will show level, but it will not tell you about a passing motorbike, a fridge cycling on, a rustling shirt or room reflections. Record a short test, listen back properly and make adjustments before the presenter commits to a full take.

In a lively room, soft furnishings, rugs and acoustic treatment can make a remarkable difference. A professional recording room or green-screen studio also gives you isolation from interruptions, along with an engineer who can catch the problems a busy presenter may not hear.

Light the face before the background

Put the presenter a little way from the wall or backdrop. This creates depth and reduces heavy shadows. Begin with a large, soft key light at roughly 45 degrees from their face and slightly above eye level. Add gentle fill from the other side only if the shadows are too deep, then use a subtle back or hair light if separation is needed.

Avoid relying on overhead office lighting. It tends to create dark eye sockets and unflattering shine. Daylight can be lovely, particularly in a coastal setting, but it changes quickly. If the shoot must match across several takes, control window light with blinds or diffusion and use properly balanced lamps as your main source.

For green-screen work, light the screen separately and evenly. The presenter should stand far enough in front of it to avoid green spill around the shoulders and hair. A wrinkled, unevenly lit screen creates extra work in the edit and can leave edges looking artificial.

Frame for the platform and the edit

A medium shot, usually from mid-chest upwards, is a dependable starting point. Leave a little headroom, keep the eyes near the upper third of the frame and make sure the presenter has space to look into if they are angled slightly away from camera. If they speak directly to the viewer, look straight into the lens, not at their own image on a monitor.

Shoot in the format the finished video needs. Landscape is often right for websites, longer interviews and video platforms. Vertical framing is useful for social clips and mobile-first campaigns. If you need both, plan for it at the outset. A wider 4K shot can give an editor room to create a vertical crop, but only if the presenter, graphics and demonstrations stay within a safe central area.

A second camera adds useful cutaways and can hide edits between takes. It is particularly valuable when the presenter is explaining a process, responding to questions or working with an object. The trade-off is more setup, matching and editing, so it is not essential for every short piece.

Help the presenter look and sound like themselves

People do not need to be natural-born broadcasters to make excellent presenter videos. They need a calm room, clear direction and permission to do more than one take. Start with a low-stakes warm-up: ask them to describe the subject in their own words without recording the final version. This gets the voice moving and reveals the language they use instinctively.

Keep the crew small where possible. Too many people watching can make a first-time presenter self-conscious. Give notes in specific, practical terms: slow the first sentence, hold the final word, lift your eyes to the lens, or pause before the next point. Avoid the unhelpful instruction to simply be more natural.

A teleprompter can be excellent for detail-heavy material, but it needs preparation. Set the type large enough to read comfortably, scroll slowly and write in lines that follow natural breaths. If the presenter starts sounding flat, reduce the amount of copy visible at once or move back to key prompts. A conversational delivery is worth more than perfect word-for-word accuracy.

Clothing matters on camera, though it should not become a distraction. Solid colours generally work well. Very fine stripes, tight patterns and highly reflective fabrics can shimmer or pull focus. For green-screen filming, avoid green clothing and consider whether glasses, jewellery or long hair need a little extra attention in the lighting.

Make the shoot easy to edit

Record a few seconds of silence in the room before or after the session. This room tone helps smooth audio edits. Capture clean versions of any demonstrations, screen recordings, product close-ups or location shots that will support the presenter. These are not filler. Used well, they keep visual momentum while allowing you to shorten pauses or combine the strongest parts of separate takes.

Leave a beat before and after each answer or scripted section. It gives the editor room to cut cleanly. If a sentence goes wrong, do not automatically start from the beginning. Ask the presenter to repeat the line from one sentence earlier, with the same posture and energy. This creates a much cleaner join.

Back up footage immediately in two locations, label files clearly and make a note of the best takes while the session is fresh. A polished edit should balance levels, remove distracting mistakes, correct colour consistently and add captions where appropriate. Captions help accessibility, support viewers watching without sound and make a presenter’s key points easier to follow.

Choose the right production space

A home or office setup can work well for regular, informal updates, especially when the room is quiet and you can leave the lighting in place. For a campaign film, an interview series, a launch or anything where brand perception is on the line, a dedicated studio is often more efficient. You avoid spending half the day moving furniture, fighting inconsistent daylight and troubleshooting sound.

At Yougig, an intimate green-screen studio can be paired with camera, lighting, audio and editing support, while the waterfront setting offers a calmer alternative to a clinical production space. That combination is useful when a presenter needs time to relax, rehearse and get the performance right rather than rush through a hired room.

The best presenter videos do not feel overproduced. They feel clear, comfortable and purposeful. Give your speaker a message they can own, a setup that supports them and enough breathing room to find their voice. The camera will do the rest.

Best Microphones for Beatbox Recording in 2026

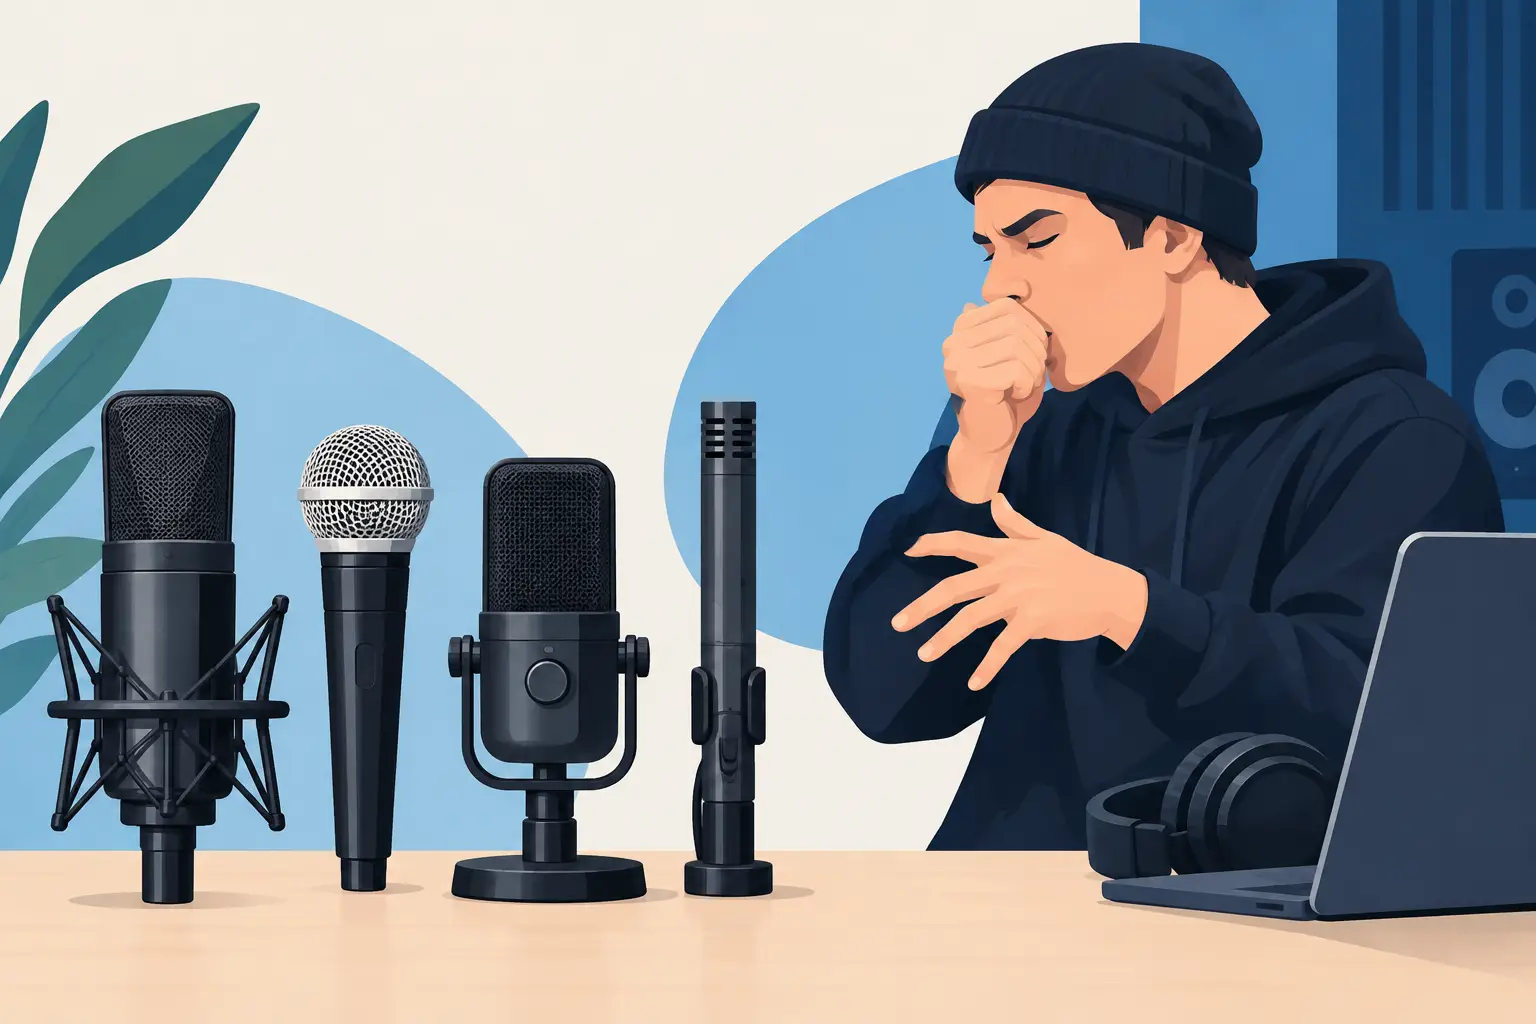
A beatbox take can move from a chesty sub kick to a sharp inward snare in a fraction of a second. That range is exactly why the best microphones for beatbox recording are not simply the most expensive ones. The right choice needs to take high sound pressure, fast transients, breath noise and close-up performance in its stride, while still giving you a sound you can shape confidently in the mix.

For most artists, the aim is not clinical perfection. It is a recording that feels physical, controlled and alive – one that carries the detail of the mouth work without turning every pop, lip smack and movement into a problem. Your room, performance style and whether the recording is for a track, a live video or a loop-based session all matter as much as the microphone itself.

What a beatbox microphone has to handle

Beatboxing places unusual demands on a vocal microphone. Plosive-heavy bass sounds create powerful bursts of air, while hi-hats and snares contain bright, quick detail that can become brittle if the top end is too aggressive. Add proximity effect – the bass lift that happens when you work very close to a directional microphone – and you can quickly end up with either a thin take or an overblown low end.

A useful beatbox mic should handle high SPLs without folding under pressure. It should also have a predictable response when you work close, because distance is part of the performance. Many beatbox artists naturally cup, angle or pull away from the mic to control their tone. A microphone that changes character wildly with small movements can make that expressive approach harder to capture.

The room matters too. In a treated recording space, a more sensitive microphone can reveal impressive detail. In a bedroom, rehearsal room or live setting with spill, a less sensitive option often gives a cleaner result simply because it hears less of everything around you.

The best microphones for beatbox recording: choose by session

There is no single winner for every mouth, track or stage. Think in terms of microphone types and the job in front of you.

Dynamic vocal microphones for punch and control

A quality dynamic vocal microphone is the most reliable starting point for beatbox recording. These microphones are built to cope with close vocals and loud sources, typically have a directional pickup pattern, and tend to take the edge off an overly bright room. Their lower sensitivity can be a real advantage when you are recording near equipment, traffic, rehearsal spill or other performers.

For bass-forward beatboxing, a dynamic mic gives you a practical balance of weight and control. You can work close for body, then ease back slightly for louder kicks. It is also the sensible choice for live performance capture, where handling noise, monitor spill and movement are part of the deal.

The trade-off is that a dynamic microphone may not reproduce the finest high-frequency textures as openly as a good condenser. If your style relies on delicate clicks, whispered textures or ultra-fast hi-hat patterns, you may want to add a second microphone rather than force one source to do every job.

Large-diaphragm condensers for detail in a treated room

A large-diaphragm condenser can make beatboxing sound startlingly close and three-dimensional. It is well suited to a controlled studio recording where you want nuanced layers, vocal phrases and detailed percussion from one performance. It can be particularly effective for a track that blends singing, rap and beatbox rather than treating the beatbox as a purely percussive element.

However, sensitivity brings responsibility. Condensers pick up mouth noise, headphone bleed, chair creaks and reflections from untreated walls. Their extended top end can make cymbal-like sounds exciting, but may also exaggerate harsh sibilance. Use a pop shield, stay disciplined with distance, and do not assume that more detail is always more musical.

If you choose this route, start with the microphone slightly off-axis rather than directly in front of the mouth. A small angle helps soften air blasts while preserving articulation. Recording a short test – bass, snare, hats and your loudest pattern – before committing to a full take will save time later.

Broadcast-style dynamics for close, intimate takes

Broadcast-style dynamic microphones sit between the rugged live vocal option and the high-detail condenser approach. They are designed for close speech, often with a fuller low-mid character and strong rejection of room sound. That makes them a strong fit for beatbox artists recording content, freestyle sessions, tutorials or vocal-and-beatbox performances in less-than-perfect acoustic spaces.

They can sound wonderfully substantial, but placement is crucial. At very close range, some will produce more low end than the arrangement needs. A small high-pass filter during recording or mixing can tidy rumble without stripping the performance of its punch. Keep the filter gentle at first. Beatbox low end is part of the instrument, not a fault to be removed by default.

Small-diaphragm condensers for texture and stereo work

Small-diaphragm condensers are not usually the first microphone you put in front of a beatboxer, but they can be excellent support mics. Their fast transient response can capture hats, tongue clicks and the sharp attack of snares with impressive accuracy. In a well-treated live room, one can be placed at a little distance to capture a more natural sense of space alongside a close dynamic microphone.

This is a more advanced setup, because phase matters. If the close and room microphones are not aligned well, the low end can lose impact when both channels are combined. Record a quick test, listen in mono, and move the distant mic before reaching for corrective processing.

Placement is half the sound

A well-chosen microphone can still sound wrong when it is placed like an ordinary vocal mic. Begin around 10 to 15 centimetres away, with the capsule just to one side of centre. This reduces direct blasts of air while retaining low-end energy. From there, make changes with purpose: closer for more weight, further back for a more balanced tone, and more off-axis when plosives are taking over.

A pop shield is worth using even with a dynamic microphone. It does not just protect against obvious popping on spoken words. It creates a consistent distance reference, helping you perform with repeatable mic technique. For extreme bass sounds, an additional layer of wind protection can be useful, but avoid so much foam that the upper detail becomes dull.

Do not grip the grille or cup the microphone unless that is an intentional part of your live sound. Covering ports on a directional microphone can alter its pickup pattern and make the recording boomy, boxy or prone to feedback. If you want that compressed, enclosed character, capture it deliberately as an alternate take rather than making it your only option.

Gain staging without flattening the performance

Beatbox recordings need headroom. Set the preamp for the loudest sounds you can make, not for the opening pattern you happen to perform during the soundcheck. Digital clipping is unforgiving, and a clipped inward snare cannot be repaired convincingly afterwards.

Aim for peaks that leave comfortable room below the maximum level. The exact number matters less than avoiding red lights while retaining a healthy recording level. If your interface or preamp has a pad, use it when the source is genuinely overloading the input. Do not use it automatically: too much attenuation can leave you compensating with noise later.

Compression is best treated as performance support, not a rescue tool. Gentle compression while recording can be useful if you know the chain well, but many artists are better served by recording clean and shaping dynamics during the mix. A beatbox part often needs fast control on occasional spikes, yet it also needs the transient snap that makes the rhythm feel human.

A practical two-mic approach

When a production needs both chest-shaking lows and precise high detail, a two-microphone setup can give you more options. Use a close dynamic or broadcast-style microphone as the main source, then place a condenser slightly further back and above mouth level to collect texture and air. The close channel supplies impact; the second channel can be blended quietly until the performance opens up.

Keep the secondary mic subtle. If listeners notice a separate bright layer rather than a fuller performance, it is probably too loud. Check phase in mono before you start editing, and commit to one main microphone if the pair is not improving the sound.

At Yougig, a proper soundcheck in the live room can establish this quickly: a few performance-level patterns, a listen through the monitoring chain, then small changes to angle, distance and gain before the real take begins. It is a calmer way to work than trying to fix every issue after the session.

Buy for your real workflow

If you record rough ideas at home, rehearse loudly and film live clips, choose a dependable dynamic microphone first. It will cope with imperfect acoustics and travel well from rehearsal to stage. If you mainly build polished releases in a treated studio and your style contains a lot of fine vocal texture, a condenser may earn its place. For creator-led video and close, spoken-to-camera beatbox content, a broadcast-style dynamic offers a particularly useful middle ground.

The best choice is the microphone that lets you perform without second-guessing every kick and snare. Get the source comfortable, leave enough headroom, and make the room work for the rhythm. The character of your beatbox should arrive at the listener before they ever start thinking about the equipment.

Are Live Streams Copyright Safe? What to Know

A live set can feel wonderfully immediate: cameras roll, the chat wakes up, and people far beyond the room get to share the performance. But are live streams copyright safe? Not automatically. A stream is still a public use of music, video, images and recordings, even when it is informal, free to watch or disappears shortly after broadcast.

The useful question is not whether livestreaming is safe in general. It is whether you have permission for every creative element your audience will hear or see, and whether the platform you use permits that use. For musicians, creators and event organisers, sorting this before the first camera goes live protects the work, the channel and the atmosphere in the room.

Are live streams copyright safe for original performances?

They can be, provided the rights are clear. If you are performing a song you wrote entirely yourself, own the recording, and have not included unlicensed samples, backing tracks, visuals or clips, you are in the strongest position. Yet even an original song can involve other people’s rights.

A co-writer may own part of the composition. A producer may have agreed a stake in a particular master recording. A featured vocalist, session player or label arrangement may affect what can be released. If the livestream is filmed, those people may also need to agree to their performance being captured and used in a video.

For a band, have the conversation before the stream rather than after it has gathered views. Agree who can authorise the broadcast, whether the full recording can remain online, how any income is split, and whether clips can be used in future promotion. A simple written agreement is far less awkward than removing a popular performance later.

The distinction between the song and the recording matters. Copyright in the composition covers the lyrics and music. Copyright in the sound recording covers a particular recorded version. A live performance creates its own recording and film, so ownership should be clear from the start.

Covers, backing tracks and samples change the picture

Cover songs are where many otherwise careful streams run into trouble. You may have permission to perform a cover at a venue under the venue’s music licence, but that does not necessarily give you permission to broadcast it worldwide on video. A livestream and an archived video can involve separate rights, and the answer varies by territory, platform and the way the content is used.

Some platforms hold arrangements with music rights organisations that allow certain uses of songs. These arrangements are not a universal blanket permission for every account, every country or every type of stream. They may not cover commercial broadcasts, ticketed events, branded content, paid advertising, on-demand replays or the use of backing tracks. Platforms can also change their policies without much notice.

Do not assume that a cover is permitted simply because other creators are streaming it. A stream may be detected later, muted in some territories, blocked, claimed for revenue or removed altogether. The result can depend on the rights holder’s chosen policy as much as the platform’s automated system.

Backing tracks add another layer. You may be entitled to perform the underlying song but not to use somebody else’s recorded instrumental. The same is true of a DJ set, a loop bought for a demo, a commercial karaoke track, or a beat sent over by a producer with unclear terms. Check what the licence actually permits: live performance, broadcast, monetisation, editing and permanent online availability are not interchangeable.

Samples deserve the same scrutiny. A short sample is not automatically safe, and altering it does not guarantee clearance. If the sample remains recognisable or forms a meaningful part of the track, obtain permission or replace it with an original alternative.

The camera sees more than the performance

Copyright issues are not only about the song list. A multi-camera stream can pick up a poster on the wall, a video playing on a monitor, a television in the background, projected artwork, branded slides, photographs or a book reading. These may be small details creatively, but they can still trigger claims or complicate reuse.

Walk through the frame before the audience arrives. Remove commercial music from the foyer and control-room speakers. Use artwork you created, commissioned or licensed for broadcast. If a presentation includes images, clips or charts, make sure their licence covers livestreaming rather than just use in a room or on a website.

The same goes for pre-show and interval music. It is easy to build a welcoming mood with a favourite playlist, then find that the platform mutes the recording. Original music, properly licensed library music, or a deliberately quiet countdown screen is usually the calmer option.

A platform is not your clearance department

Live platforms provide the technical route to an audience. They do not take responsibility for every right in what you upload. Automated copyright tools can identify music during the stream or after it ends, but a lack of warning is not proof that the content is cleared.

Their treatment of a match can vary. One platform might allow the stream but place adverts on the replay. Another may mute a section, restrict viewing in particular countries or interrupt the broadcast. A rights holder may also submit a manual complaint later. If you are broadcasting for a client, a festival, a business or a charity, those outcomes affect more than one channel’s reputation.

Read the platform’s current music and monetisation rules before announcing the event. Pay particular attention to whether you plan to leave the stream available, cut highlights, run paid adverts, accept tips, sell access or simulcast to multiple destinations. Each additional use can change the permissions you need.

Plan the rights as part of production

A good livestream plan includes a rights check alongside the camera plan, audio routing and internet test. It need not be bureaucratic. It simply gives everyone a shared understanding of what is being captured and what happens to it afterwards.

Start with the running order. Mark each item as original, cover, licensed, public domain or pending clearance. Then list every non-performance asset: intro music, stings, backing tracks, logos, slides, stills, video inserts and remote guest contributions. For anything you did not make, keep a record of who granted permission and what the permission covers.

For performers and guests, confirm that they consent to being filmed and recorded. This is especially helpful with interview guests, young performers, audience members and collaborators joining remotely. If you want to make social clips from the session, say so clearly. A release should cover the intended use without pretending to grant rights a person does not own.

If the stream takes place at a venue or rehearsal space, establish who is responsible for any relevant music licensing. Do not rely on assumptions made for an in-person event. The organiser, venue, artist and production team may all have different responsibilities, so put the decision in writing.

At Yougig, that production conversation can sit naturally alongside the practical details: camera angles, multitrack capture, clean monitoring and where the final edit will live. It leaves more headspace for the actual performance.

Keep a clean version when possible

For many artists, the smartest approach is to separate the live moment from the long-term asset. You may decide to broadcast a set with appropriate permissions, then edit a separate replay or highlights package using only cleared material. Or you may perform originals live and reserve cover material for an in-room set.

Recording isolated audio and camera feeds gives you options, but it does not remove the need for rights clearance. It does, however, allow you to replace an unlicensed walk-on track, remove a problematic section or create short clips that match the permissions you have obtained. A well-recorded session is more adaptable than a single compressed stream file.

Do not forget the chat and remote contributors. Moderation will not solve copyright questions, but it can prevent viewers posting infringing material, abusive messages or personal information that becomes part of the broadcast. Give a remote guest a simple technical brief too: headphones on, notifications off, no television or commercial music running nearby.

When should you ask for specialist advice?

If money, sponsorship, a large audience or a recognised catalogue is involved, get advice before going live. The same applies to streams that include film clips, sport, theatre, archive footage, record-label releases, music videos or performances from several territories. Rights chains can be complex, and a quick professional check is cheaper than a cancelled campaign or an account strike.

For a small original set, the route is often much clearer: own what you use, document collaborator permissions, keep the visual environment clean, and check the destination platform’s rules. For covers and mixed-media broadcasts, treat clearance as a production task, not an afterthought.

The best live streams feel effortless because the preparation is quiet and thorough. Give the rights the same care as the soundcheck, and your audience can focus on the performance rather than what disappears halfway through it.

How to Digitise Cassette Tapes Without Losing Character

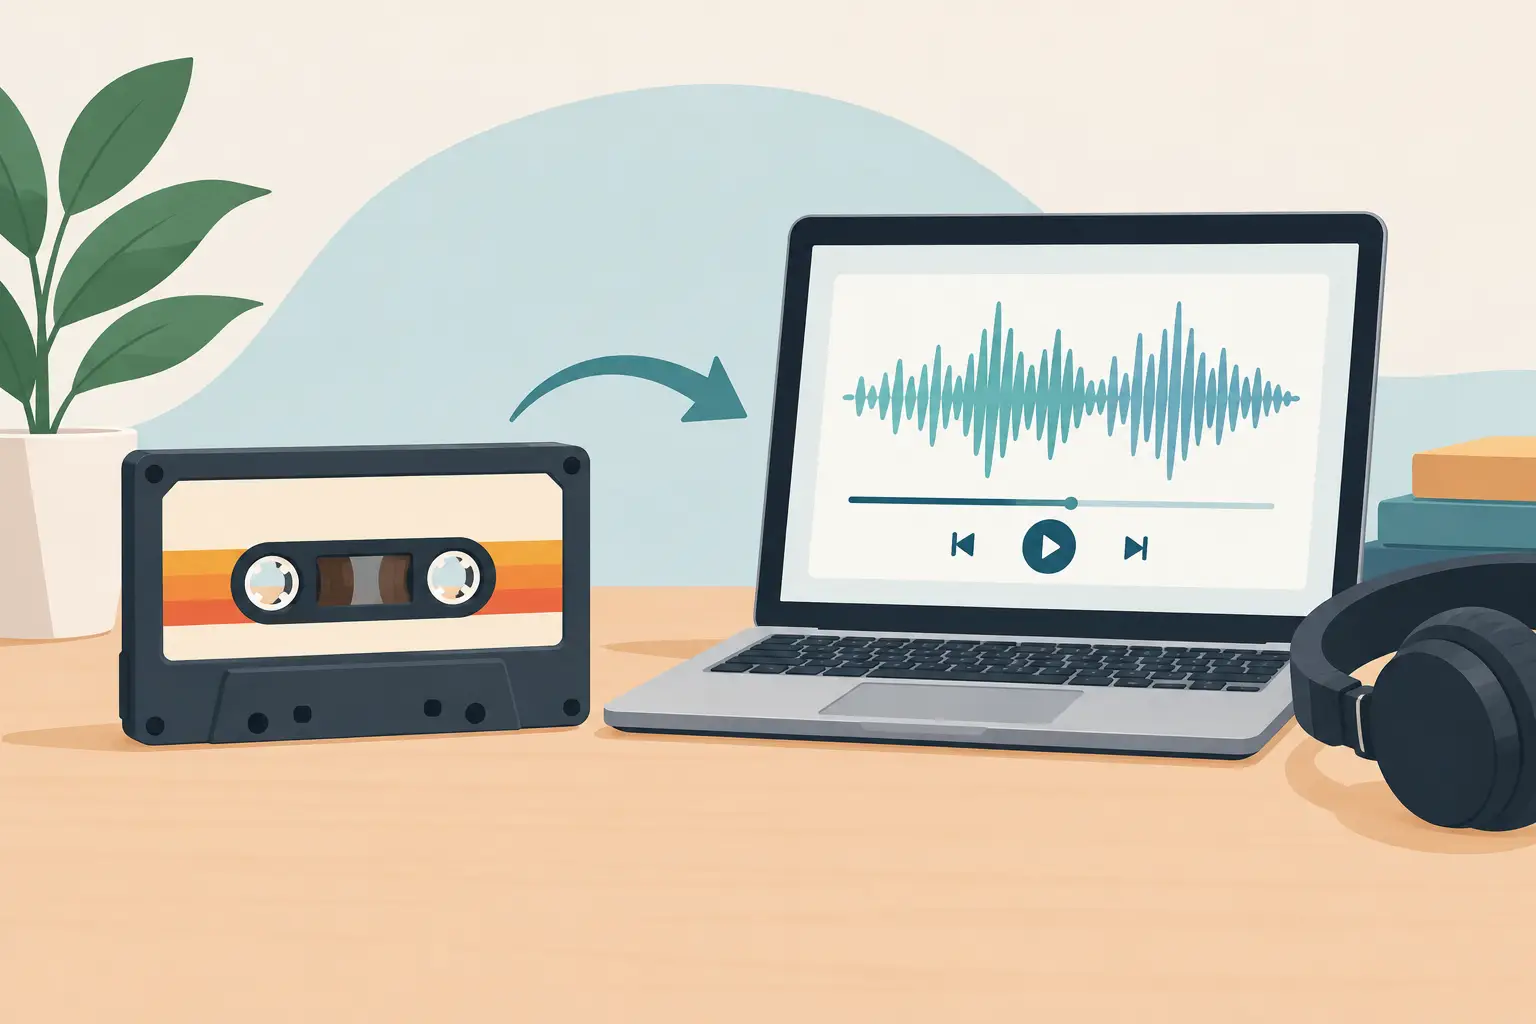
That box of cassettes may contain far more than old songs. It could hold a band’s first demo, a late-night radio interview, a parent’s voice, a mixtape made for someone important, or a rehearsal that captures a version of a song nobody ever recorded again. Learning how to digitise cassette tapes is not simply about moving audio to a computer. It is about making careful choices before ageing tape, sticky mechanisms and fading players make those recordings harder to recover.

Cassette is a forgiving format in some ways, but it is not immortal. Tape can shed oxide, stretch, curl or suffer from dropouts. The longer it sits in a loft, garage or damp cupboard, the more unpredictable playback can become. A good transfer preserves what is on the tape, including its warmth and character, without adding unnecessary noise, distortion or damage along the way.

How to digitise cassette tapes properly

The basic route is straightforward: play the cassette on a well-maintained deck, send the audio into an interface or recorder, capture it at a sensible quality, then edit and archive the resulting files. The quality of each stage matters. A clean, correctly aligned cassette deck will usually make more difference than expensive software applied afterwards.

Start by inspecting the cassette. Check that the shell is intact, the tape is not visibly crinkled, and both reels turn freely. If the tape has been stored in a dusty case, wipe the outside before putting it near a deck. Do not force a stiff cassette into a player or try to repair snapped tape unless you are confident handling delicate media. A damaged tape can catch in the transport and turn a recoverable recording into a difficult restoration job.

Before playing anything precious, clean the deck’s playback head, capstan and pinch roller with appropriate cleaning materials. Built-up oxide and dirt can dull the top end, cause uneven sound or leave residue on the next tape. If your deck has a demagnetising procedure and you know how to use it safely, that may also help reduce unwanted high-frequency loss.

Choose a proper cassette deck where possible

A cassette deck with line-level outputs is the preferred starting point. Connect its left and right RCA outputs to the line inputs on an audio interface, mixer or dedicated recorder. Avoid using a headphone socket unless it is the only option, as headphone outputs can introduce extra noise, distortion or a less predictable level.

Portable cassette players and USB cassette converters can be convenient for low-stakes recordings, especially if you need a quick reference copy. Their limitation is usually the transport: variable speed, worn heads and poor channel balance are common. For a one-of-a-kind recording, a solid deck and good conversion chain are worth the effort.

If your cassette was recorded with Dolby noise reduction, playback is more nuanced. Ideally, use the corresponding Dolby setting on the deck. Playing a Dolby-encoded tape without it can make the recording sound overly bright and hissy. However, old tapes do not always state which system was used, and some recordings were made on machines with imperfect calibration. Trust your ears and capture a short test before committing to the full transfer.

Set levels for preservation, not volume

Digital recording leaves no room for clipping. Once a peak has hit 0 dBFS and distorted, no amount of editing can restore the original waveform. Set your input gain while listening to the loudest section of the cassette, not just the opening few seconds. Aim for peaks around -12 dBFS to -6 dBFS. That gives you useful headroom for an unexpectedly loud chorus, laugh, drum hit or tape bump.

Do not try to make the transfer sound loud at the recording stage. You can raise level later with far more control. The first job is to capture a clean, complete version of what is on the cassette.

Record in stereo even when you suspect the original is mono. Some mono recordings have different noise, dropouts or level changes on each side, and a stereo capture gives you options during restoration. You can always create a mono listening version later.

For archival masters, record at 24-bit and either 44.1 kHz or 48 kHz. A 24-bit file offers comfortable headroom and makes gentle restoration easier. Both sample rates are suitable for cassette transfers: 44.1 kHz is practical for music-focused archives, while 48 kHz sits naturally alongside video and broadcast workflows. Save the master as WAV rather than MP3 or another compressed format.

Record the whole side in one pass

Let each side play from beginning to end where possible. Capturing it as one continuous file preserves the original running order, pauses, spoken introductions and accidental moments that may later matter. It also makes it easier to compare the digital transfer against the physical tape.

Make a note of anything unusual as you work: dropouts at a particular time, a tape that slows down, a side recorded at an unusually low level, or a section that appears to be in the wrong order. These notes become valuable when you revisit the archive months later.

Once the full side is recorded, listen through the file before packing the tape away. Check for digital clipping, missing channels, excessive hum and any mechanical problem that may have occurred during playback. If the cassette is fragile but plays successfully, it can be wise to make a second capture immediately rather than assuming it will behave the same way next time.

Restore gently and keep the original safe

Restoration should improve intelligibility and listening comfort, not rewrite history. Cassette hiss, hum and occasional clicks are part of the format, but they can sometimes obscure a performance or spoken word recording. Use noise reduction cautiously. Heavy processing can produce watery cymbals, pumping ambience and voices that sound unnatural.

A light high-pass filter may reduce low rumble. A narrow cut can help with mains hum if it is present. Subtle equalisation may restore clarity to a dull recording, particularly where the original deck was not perfectly aligned. But make these adjustments on a copy, never the only file.

Keep at least two versions: an untouched transfer labelled as the archive master, and a listening or restored version for everyday use. If you edit tracks into separate files, retain the full-side master as well. The uninterrupted recording is your reference point if you later question an edit or want to try a better restoration process.

Name files so they remain useful

A folder named “old tapes” becomes meaningless very quickly. Give files clear names that include a date if known, the artist or speaker, the tape title and side. For example: `1996-07_Band-Rehearsal_The-Crown_Side-A_Master.wav`.

Add a simple text document or spreadsheet with details that will not fit in a filename: cassette brand, noise-reduction setting, deck used, condition of the tape, known track names and any restoration carried out. For family recordings, write down who is speaking while that knowledge is still available.

Back up the digital archive

One digital copy is not preservation. Keep the master files in at least three places: on your working drive, on a separate backup drive and in a secure off-site or cloud backup. Check that those files still open from time to time. Storage is cheap compared with losing a recording that cannot be recreated.

Store the original cassettes too. Keep them upright in their cases, away from direct sunlight, high heat, damp and strong magnetic fields. The digital version is easier to enjoy, share and edit, but the cassette remains the source material and may benefit from a better transfer method in the future.

When a studio transfer is the sensible route

A home setup is ideal for common tapes in good condition and projects where you enjoy the process. Professional help is often the better call for rare recordings, irreplaceable voice tapes, demo archives, tapes with audible speed issues, or material destined for release. The work may involve deck maintenance, careful level matching, manual repair, restoration and detailed delivery rather than simply pressing record.

At Yougig, analogue-to-digital remastering can sit alongside editing, mixing and even video work if an old cassette project is growing into a release, documentary or live-performance story. That is useful when you want a recording treated as source material for a new creative chapter, not just copied from one format to another.

The best time to transfer a cassette is while it still plays cleanly. Put on the tape you have been meaning to revisit, listen closely to what it carries, and give that small piece of recorded history a safe place to live.

How to Plan Studio Livestream Sessions Properly

A live performance has a useful kind of pressure: there is no hiding behind a dozen takes. But that pressure should belong to the song, the conversation or the performance – not to a missing cable, an unchecked vocal mic or a camera operator wondering where the next section starts.

To plan studio livestream sessions well, give the creative work room to breathe before the red light comes on. The strongest broadcasts feel immediate because the technical decisions were made early, the artists know what to expect, and everyone has a clear job once the show begins.

Start with the moment you want viewers to have

Before choosing cameras or platforms, decide what the audience is coming to see. A stripped-back singer-songwriter set calls for close, patient framing and intimate sound. A full band needs energy, movement and enough camera coverage to make the arrangement readable. A presenter-led stream may need clean eyelines, graphics, a confident opening and a green-screen setup rather than a live room full of instruments.

This choice shapes almost every production decision. Ask whether the stream is a one-off event, a live session that will also become release content, a ticketed show, a product announcement, or an interview with audience questions. One performance can serve several purposes, but trying to make it do everything often makes the result feel unfocused.

It also helps to set one clear viewer promise. Perhaps people will hear new material performed in full for the first time. Perhaps they will get a close-up studio session with a favourite local artist. Perhaps they can ask a guest questions live. That promise should guide the running order, promotion and production style.

How to plan studio livestream sessions around the performer

A good plan begins with the artist’s practical needs. Confirm the line-up, instruments, backline, playback, monitoring, microphones and any guests before the day. If someone is bringing a laptop, sampler or unusual instrument, allow time to test it properly. A small uncertainty at setup can become a large distraction once you are live.

Build the schedule backwards from the advertised start time. Include access, load-in, setup, lighting, soundcheck, camera rehearsal, a short break and a final pre-stream check. For a band, the camera rehearsal matters as much as the musical soundcheck. Performers need to know where they can move, whether a particular camera will be close during a solo, and how the presenter or producer will cue the start.

Do not schedule every minute too tightly. A livestream has fixed deadlines, but people still need water, a quiet moment and time to solve the unexpected. A floating studio setting can be wonderfully calming for creative work, yet it remains a working production environment. Arriving early lets everyone settle in before the session shifts into broadcast mode.

Write a run sheet people can actually use

A run sheet is not corporate paperwork. It is the shared map that keeps a live production moving when nobody has time for a long conversation. Keep it concise and visible to the people who need it.

For each section, note the start time, duration, what is happening on screen, who is speaking or performing, the relevant audio source, camera priority and any graphics or playback cue. Add practical details such as a guitar change, guest entrance, audience question segment or end-card. If a song has a quiet opening, a dramatic tempo change or a planned false ending, flag it for the camera team.

The run sheet should leave room for real life. Live comments may prompt an extra question, or an artist may take a moment to tune. Rather than scripting every word, identify the non-negotiables: the opening, key messages, breaks, closing call to action and any sponsor or release announcements. The rest can retain the human looseness that makes live work worth watching.

Put sound ahead of spectacle

Viewers will forgive an imperfect camera angle sooner than distorted vocals, unbalanced drums or speech they cannot understand. Treat the audio mix as the centre of the stream, particularly for music. A multitrack recording setup gives useful flexibility for later edits, but the live mix still needs to stand on its own at the moment of broadcast.

Plan separate monitoring where possible. What works in performers’ headphones is not necessarily what belongs in the streamed mix. A singer may need more of their own vocal; an online audience may need a more measured balance, controlled low end and clear ambience. Confirm whether the act wants in-ear monitoring, wedges or a mixture, then make sure the stage volume supports the microphones and cameras rather than fighting them.

For spoken content, test every voice in the position where it will be heard. A seated interview, a standing presenter and a guest joining remotely all have different requirements. Check plosives, clothing noise, breathing space around the microphone and the level of any music bed. If a remote contributor is involved, agree a backup contact method before going live.

Design camera coverage with purpose

Multi-camera production does not mean filming everything from every angle. It means having the right view ready when the story changes. For a band, that might include a wide shot that establishes the room, a lead-performance camera, a detail angle for hands and instruments, and a roaming or side view for movement. For a conversation, a clean two-shot plus individual close-ups is often more valuable than constant visual motion.

Walk the room with the performers during rehearsal. Mark any areas where cameras cannot safely go, especially where cables, stands and energetic movement meet. Discuss whether cameras should remain discreet or become part of the atmosphere. Some artists enjoy the sense of an active session; others perform best when the equipment fades into the background.

Lighting needs the same restraint. The goal is not simply to make the room bright. It is to give faces shape, preserve atmosphere and ensure cameras can hold a consistent image throughout the set. If a set includes a lighting change, haze, projections or a green-screen element, test it on camera rather than judging it only by eye.

Choose a platform and build a sensible backup

Where the stream goes depends on who needs to find it. A public social platform can work well for reach and fast audience interaction. A dedicated broadcast page may suit a ticketed event, a client presentation or a more controlled branded experience. Streaming to more than one destination can increase accessibility, though it also adds planning around comments, captions, graphics and moderation.

Decide in advance who is watching the chat and what they can respond to. An artist cannot perform a demanding set and field every question at once. Give a host, producer or trusted team member responsibility for comments, audience prompts and any moderation needed to keep the space welcoming.

Every livestream should have a fallback plan. That includes a tested internet connection, backup recording, spare batteries and media, replacement cables, emergency contact details and a clear decision-maker if something fails. Not every issue needs to be announced to viewers. Calm production usually means a problem has been noticed and handled before it becomes the show.

Rehearse the transitions, not just the songs

Most awkward livestream moments happen between the polished bits. The performance may be excellent, then a long pause arrives while somebody searches for a capo, moves a stool or works out which camera is live. Rehearse the starts, finishes, instrument swaps, introductions and exits with the same care as the material itself.

Run the first five minutes from beginning to end. Check that the stream opens on the intended image, the audio is live, the host knows their first line and any titles appear at the right time. Then run the final two minutes too. A confident close tells viewers what to do next, whether that is follow the artist, watch another piece of content or look out for the release.

At Yougig, the advantage of bringing rehearsal, recording, multi-camera capture and broadcast thinking into one waterfront workspace is that the plan can be tested in the room where it will happen. The performance remains the focus, while the production team can shape the practical details around it.

When the session is over, save the stream recording, multitracks and camera files clearly before packing down. Those assets can become a polished live video, short social edits, audio releases or a record of a performance that only happened once. Plan for that future use early, then let the live moment do what it does best: connect people in real time.

Multitrack Recording Studio Guide for Bands

A great take can disappear surprisingly quickly when the drummer cannot hear the vocal, the guitarist changes amp settings between songs, or nobody has agreed what the finished track should feel like. This multitrack recording studio guide is for artists who want the session to stay musical while every part is captured cleanly enough to shape later.

Multitrack recording is not simply pressing record on more microphones. It is a way of giving a performance room to breathe. Each instrument, voice and sound source is recorded to its own channel, so levels, tone, timing and effects can be refined after the players have left the live room. Done well, it preserves the energy of playing together without forcing you to live with every decision made in the moment.

What multitrack recording gives you

Recording a band to a single stereo file can be exciting, immediate and perfectly right for a stripped-back performance. But it also commits you to the balance, sound and mistakes captured on the day. If the cymbals are too loud or a brilliant vocal take has one line that needs replacing, there is very little room to manoeuvre.

A multitrack session keeps the separate ingredients available. A typical band recording might include individual drum mics, bass, guitars, keys, lead and backing vocals, plus room mics for a sense of space. A rapper may need a lead vocal, doubles, ad-libs and a stereo beat. A podcast may need separate microphones for every guest, a remote contribution and a clean recording of its music bed.

That flexibility is valuable, but it does not mean every track needs endless correction. The best results usually begin with a compelling performance and thoughtful sounds at source. Editing and mixing should support the character of the session, not try to invent one after the fact.

Choose the right multitrack recording studio setup

Start with the project, rather than a fixed list of equipment. A four-piece playing live needs enough isolation and sensible sightlines, while an intimate vocal session may benefit more from a quiet booth, a comfortable control room and time to explore delivery. If video matters too, ask how cameras, lighting and playback will work before the day begins.

Live room, control room and comfort

A good live room lets musicians hear and see each other naturally. That matters particularly for drums, loud guitar amps, beatboxing and rhythm-led performances, where the interaction between players is often the thing worth capturing. Isolation can help control spill between microphones, but too much separation can make a band feel disconnected. The right balance depends on the arrangement and whether you want a tight, produced sound or the atmosphere of a live performance.

The control room is where decisions become clear. It should be a place where the artist and engineer can listen critically without the pressure of standing beside a drum kit. Do not underestimate comfort either. A calm setting, daylight, space to take a breath and a welcoming engineer can be the difference between a competent vocal and the take everyone remembers.

At Yougig, the floating studio setting brings that contrast together: a proper live room and digital production suite, with the coast outside the door rather than another anonymous industrial unit.

Enough inputs, and the right monitoring

Before booking, count what must be recorded at once. A close-miked drum kit can use eight to twelve inputs before bass, guitars, keys and guide vocals are added. You do not always need to record every instrument live, but knowing the limit early prevents an awkward compromise once the room is set up.

Headphone monitoring deserves the same attention. Each performer needs a clear cue mix with enough of themselves and the rhythm section to play confidently. Vocalists often want more of their own voice and less cymbal. Drummers may need a strong click and bass. Give the engineer a simple description of what helps you perform, then allow a few minutes to get it right.

Prepare before you press record

Studio time is most productive when the creative choices have already begun at rehearsal. You do not need to remove all spontaneity, but you should know the songs, their keys, their tempos and who is responsible for each part. Bring reference tracks if you have them, not as rules to copy, but as a useful way to explain the weight, intimacy or energy you are chasing.

Fresh strings, charged pedals, spare drumsticks, leads, batteries and a properly maintained instrument all save time. A buzz from an amp, a rattling snare or a tired guitar string can become much more obvious under a sensitive microphone. It is worth solving those practical issues before the red light is on.

If you are recording to a click, rehearse to one beforehand. The click is not a test of whether you are a real musician. It is a timing reference that makes overdubs, edits and video cuts easier. Equally, not every song needs it. A rubato piano-and-vocal recording or a deliberately loose live session may sound better without a rigid grid. Decide that artistically, rather than by default.

A practical multitrack recording studio guide for the day

Arrive with a running order, but leave enough space for soundchecking and the unexpected good idea. The first hour often sets the tone for everything that follows. Use it to place microphones, build headphone mixes, check tuning, set gain levels and record a full rehearsal pass. That pass may become the keeper, so treat it as a performance rather than a disposable test.

For a band, record a strong foundation first. Drums and bass usually define the feel, with guitars, keys and guide vocals helping everyone navigate the arrangement. If the players are tight and the room has enough control, recording together can produce a natural push and pull that overdubbing cannot quite replicate.

Once the core take is secure, listen back before rushing into fixes. Make notes on any sections that need attention, then record only what is needed. Punching in a verse, adding a harmony or replacing a single guitar line is normal. Re-recording every part repeatedly can drain the life from a track and consume the time intended for vocals or creative production.

Vocal sessions benefit from clear emotional direction. Rather than saying, “do it again”, decide what needs to change: more restraint in the first verse, a cleaner consonant, more aggression on the final chorus, or a closer, conversational tone. Record full takes where possible, then capture targeted alternatives. This gives the editor useful choices without exhausting the singer.

Back up the session as you go. Confirm how the files will be stored, named and supplied after recording. A well-organised multitrack session has labelled channels, consolidated audio where required and notes about song versions, takes and edits. These details may seem unglamorous, but they make mixing faster and protect the work you have paid to create.

Plan for mixing, video and release

The recording session is only one stage of the result. Mixing balances the tracks, shapes tone, places sounds in the stereo field and builds the contrast between sections. Mastering then prepares the finished mix for consistent playback across streaming platforms, downloads, broadcast or physical formats. If you are working to a release date, leave time for both. Last-minute mastering is rarely where a track gets its best treatment.

If you want live video, tell the production team while planning the audio session. A multi-camera shoot needs consideration of camera positions, lighting, performer movement and whether the final audio will be mixed from the multitrack recording rather than the cameras’ scratch sound. That planning allows a performance video to feel immediate while still sounding polished.

The same principle applies to social clips, interviews and livestreams. Audio, picture and audience experience are connected. A clean vocal recording, a sensible backdrop and dependable monitoring will carry more impact than a complicated setup that distracts everyone from the message.

Book the room that suits the performance, prepare the parts well enough to be present, and make space for the moments that cannot be rehearsed. The strongest multitrack sessions do not feel like a technical exercise. They feel like your music finally has enough room to be heard.

Rehearsal Rooms That Make Practice Count

A rehearsal can fall apart before the first chorus if the room is too cramped, the vocal PA is struggling, or half the session disappears into setting up. The best rehearsal rooms give musicians space to play properly, hear the detail and leave with real progress – whether that means a tighter set, a new arrangement or a performance ready to capture.

For artists across Shoreham-by-Sea, Brighton and Sussex, the room matters more than people sometimes admit. It shapes how long you can focus, how confidently you can try ideas and whether rehearsal feels like a chore between gigs or a useful part of making better work.

What a good rehearsal room needs to do

A rehearsal room does not need to be luxurious. It does need to work. You should be able to get in, set up with minimal fuss, play at a meaningful volume and hear what your group actually sounds like together.

That starts with enough physical space. A three-piece can make excellent use of a compact room, but adding a second guitarist, keys, backing vocalists or a full drum kit changes the calculation quickly. If everyone is pressed against an amp, movement becomes awkward and communication suffers. Give the players room to settle into their natural positions, particularly if you are preparing for a live show.

Sound is the next consideration. A room should let you hear the relationship between instruments rather than turning everything into a blur. Drums, guitar amplifiers and bass can quickly dominate a poorly arranged space. Useful rehearsal is not about playing quietly; it is about placing equipment sensibly, managing volume and giving vocals a chance to sit above the band without being forced.

A dependable PA and vocal microphones are equally valuable. Lead vocals are often left until late in a rehearsal because the singer cannot hear themselves properly. That makes it harder to practise harmonies, work on phrasing or judge how a song will land in front of an audience. If vocals matter to the performance, they need to be part of the session from the beginning.

Choosing rehearsal rooms for your project

The right choice depends on what you are trying to achieve that day. A band running a 45-minute festival set has different needs from a songwriter testing arrangements, a rapper practising with playback, or a beatbox artist preparing a filmed live take.

Check the practical essentials first

Before booking, establish what is included and what you will need to bring. A clear room specification saves the familiar last-minute scramble for stands, leads and an adapter that nobody packed. It also helps you budget honestly: a low hourly price is only useful if the room contains the basics your session requires.

Look for clarity around drum kit availability, PA provision, microphones, amplifiers, stands and monitoring. Ask whether you can use your own backline and whether there is time built in for changing over. Bands with a complex setup may benefit from booking a slightly longer slot rather than trying to make a two-hour rehearsal do the work of three.

Access and timing are less glamorous, but they matter. If the space is difficult to reach with gear, has limited loading access or ends at a time that cuts your rehearsal short, it can drain the energy from the evening. A good room lets you arrive, get comfortable and use the time you are paying for.

Think about the atmosphere as well as the equipment

Some musicians thrive in a stripped-back, functional room. Others write better when the setting feels calm, personal and removed from the usual noise. Neither preference is wrong, but it is worth recognising that the environment affects performance.

A welcoming studio can encourage artists to take risks: try a new tempo, swap an instrument, sing the difficult harmony again or play an unfinished song in front of the band. That freedom is especially useful for emerging artists who are still finding their sound. A room should feel professional without making anyone feel they have to perform perfection from the first take.

At Yougig, the live room sits on a Shoreham-by-Sea houseboat, combining practical rehearsal space with the change of pace that a waterfront setting can bring. It is a reminder that a rehearsal space can be properly equipped without feeling clinical.

Match the room to the next step

The strongest rehearsal sessions often have a clear destination. Perhaps you have a headline set in two weeks, a live session to film, or a studio recording booked later in the month. Choosing a room with recording and video capability can make that transition easier.

This does not mean every rehearsal needs an engineer or a full multitrack recording. Sometimes a simple reference recording is enough to reveal a rushed bridge, muddy guitar sound or chorus that needs another vocal line. But when a song is close, being able to move from rehearsal into quality audio capture or multi-camera performance video can preserve the momentum.

Make rehearsal time do real work

Turning up and playing through the same set is enjoyable, but it can leave important problems untouched. A little structure helps, particularly when rehearsal time is shared and everyone has competing ideas.

Start by agreeing the priority for the session. It could be learning two new songs, tightening transitions, building a set list, fixing the ending of one track or preparing for a filmed performance. Keep that priority visible. If a conversation about a new pedal sound begins to take over, you can decide whether it serves the session or belongs in the final ten minutes.

Run songs as if they are happening in public. Do not stop at every small error. Make a note, finish the song and discuss the issue while everyone can remember it. Stopping repeatedly tends to break the musical flow and trains a band to expect interruptions. There are exceptions, of course: if a section is structurally wrong or someone has genuinely lost their place, pause and sort it out. The point is to make stopping a choice, not a reflex.

Record at least one full run-through on a mobile phone or portable recorder. The sound will not be a final mix, and it does not need to be. Listening back the next day gives you a more honest view of timing, tuning, dynamics and arrangement than memory alone. It can also show whether the song has enough contrast between verse, chorus and middle section.

Leave a few minutes at the end for decisions. Confirm tempos, set order, key changes and any jobs that need doing before the next session. A short voice note or shared message prevents the familiar situation where everyone remembers a different version of the plan.

When rehearsal becomes content

For many artists, rehearsal is no longer only preparation for a gig. It can be the place where social clips, audition footage, electronic press material or live performance videos begin. The key is to decide whether you are rehearsing for the camera or simply documenting the process.

If you want polished content, allow time for it. Performers need to consider where they stand, how they enter a song, whether microphones obscure faces and how the energy reads beyond the room. A multi-camera shoot benefits from a rehearsal that has already settled the musical essentials, rather than trying to solve performance and production problems at once.

For presenters, podcasters and solo creators, the same principle applies. A rehearsal room with production support can be a useful place to test delivery, practise interviews, record a pilot or refine a livestream format before it goes out live. Good preparation makes the final result feel effortless, even when plenty of careful work sits behind it.

Respect the room and the people in it

A rehearsal space works best when every artist treats it as shared creative infrastructure. Keep drinks away from equipment, coil leads rather than leaving them underfoot, and allow enough time to pack down properly. If something is not working, tell the studio team rather than trying to force a damaged connector or make a risky repair.

Most importantly, listen to one another. The room is there to make louder playing possible, but volume is not the same as impact. When each player can hear the song, the arrangement becomes clearer, the groove gets stronger and rehearsal starts to feel less like preparation for the real thing. It becomes part of the real thing itself.

Book the space that suits the work in front of you, arrive with one useful goal, and give the songs enough room to show you what they still need.