Blog

Green Screen Interview Guide for Natural Video

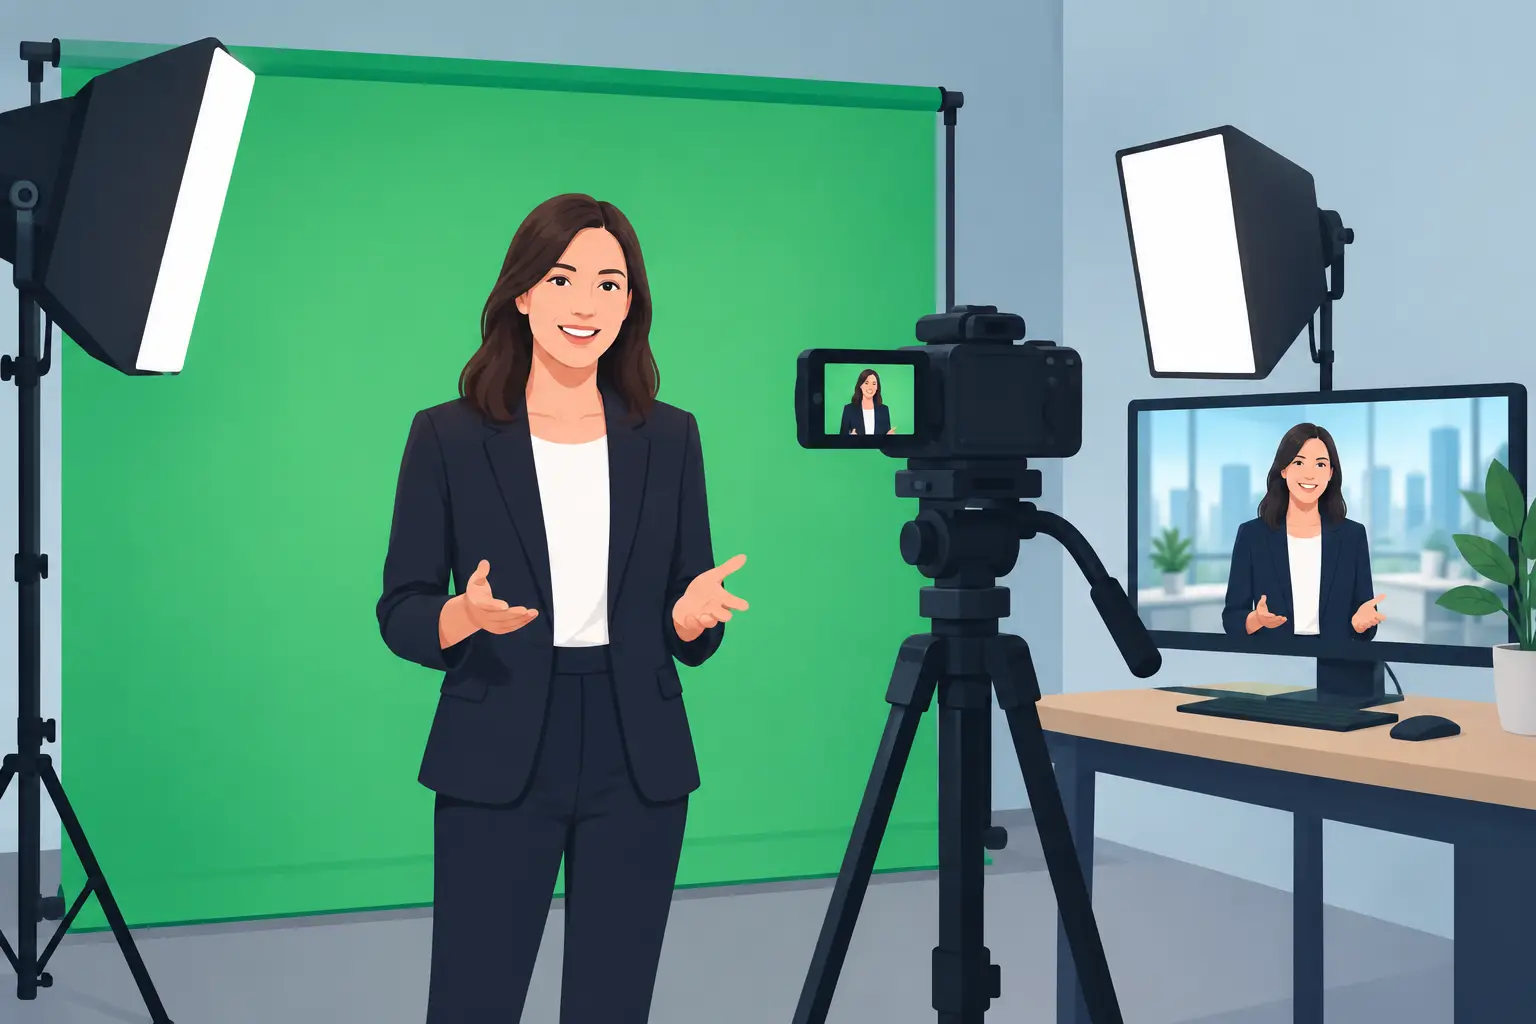
A green screen interview can look like a broadcast from almost anywhere – a newsroom, a branded set, a calm coastal view or a graphic world built around your message. It can also look immediately artificial when the subject has a green glow around their hair, the background is too sharp for the shot, or the sound feels like it was captured in a bare room. This green screen interview guide is about getting the practical decisions right before the edit, so the final video feels considered rather than pasted together.

For interviews with artists, founders, presenters and guests, the aim is not to show off the effect. It is to remove friction between the speaker and the viewer. Good keying gives you freedom in post-production while keeping the person, their voice and their point of view firmly at the centre.

Start with the background, not the green screen

The background determines more than the look of the finished film. It affects wardrobe, camera position, framing, lighting direction and how much movement you can allow in the shot. Choose it early, even if it is a simple placeholder.

A clean branded background works well for an announcement, recruitment video or a short social campaign. A designed set with depth can suit a longer conversation or a presenter piece. If your interview needs to feel grounded in a real location, use a high-quality still or moving plate with the right perspective and lighting. A background shot from slightly above eye level will not sit convincingly behind a seated guest filmed at eye level.

Think about the pace of the content too. Fast-moving graphics may suit a short launch clip, but they can become distracting behind a thoughtful interview. Often, a quieter background gives the editor more room to cut between questions, captions and supporting footage without making the screen feel busy.

Build separation before you light the screen

The most common green screen mistake is placing the guest too close to it. When green light reflects onto skin, hair, shoulders or glasses, it creates spill. Software can reduce spill, but it cannot restore detail that has already been contaminated by the screen colour.

Give the speaker as much distance from the backdrop as the room allows. Around two metres is a useful starting point, though more space is better, especially with long hair, loose clothing or a wider shot. That distance also helps the screen fall slightly out of focus, which can make an uneven surface less obvious.

Light the person and the green screen as separate jobs. The screen needs an even wash of light across the area visible to camera. The subject needs flattering, shaped light that matches the direction and mood of the planned background. Trying to light both with the same fixtures usually leads to either uneven green or a flat-looking face.

A straightforward interview setup often uses a soft key light, a gentler fill where needed and a back or hair light to define the shoulders and hair. The back light should provide separation without creating a bright edge that feels unrelated to the chosen background. If the final setting suggests window light from camera left, shape the interview lighting to support that illusion.

Check the screen with the camera, not just your eyes

A green screen can look evenly lit to the naked eye and still show darker corners or hot patches on camera. Use the actual recording camera to inspect exposure across the frame. Lock exposure and white balance once the setup is working. Automatic settings can shift during an answer, especially if a guest gestures, leans forward or a bright graphic appears on a monitor nearby.

Avoid crushing the green screen into a dark, muddy tone, but do not overexpose it either. The goal is a consistent colour with enough detail for a clean key. A properly lit screen is more valuable than an expensive plugin asked to rescue poor footage.

Wardrobe choices that keep the key clean

The obvious rule is to avoid green clothing, but the useful version is slightly broader. Avoid anything close to the exact hue of the screen, including teal or yellow-green tones that may partially disappear or create awkward transparent edges. Bring a second option if the interviewee is unsure.

Fine stripes, tight checks and high-contrast patterns can shimmer or create moiré on camera. Highly reflective jewellery, glossy glasses and sequinned fabrics can pick up green reflections. None of these items are automatically unusable, but they need testing under the actual lights and at the planned camera distance.

Solid colours generally work well, particularly blues, burgundies, charcoal, warm neutrals and colours that complement the final background. The speaker should not blend into their replacement setting either. If the background is dark, a dark jacket may lose definition. If it is bright and pale, an all-white outfit can feel detached from the scene.

Frame for the edit, not just the conversation

A comfortable interview position is usually an eyeline just to one side of the lens, with the interviewer close enough that the guest does not appear to be looking away. For a direct-to-camera message, the presenter should look into the lens and treat it as one person rather than a large audience.

Leave enough headroom and side room for the intended background, titles and subtitles, but do not make the subject so small that every frame feels distant. A medium close-up is often the most flexible choice: it captures expression, gives room for natural hand movement and remains useful across landscape and vertical edits.

If you need both horizontal and vertical versions, plan for it during the shoot. Recording in a higher resolution can allow a controlled crop later, but it does not fix poor composition. Keep essential gestures and props inside the tighter vertical safe area. A second camera angle can also make an interview feel more natural while giving the editor a clean way to remove pauses, repeated questions and stumbles.

This is where multi-camera recording earns its place. A wider shot establishes body language and space; a closer angle carries the detail of the answer. The two must match in colour, exposure, lens character and eyeline. A cut between mismatched cameras can be more distracting than a single well-composed shot.

Treat sound as half the interview

A beautiful composite cannot carry an interview if the voice is thin, echoing or interrupted by handling noise. Use a microphone suited to the speaker and format. A lavalier mic keeps the frame clean and works well when someone needs to move or demonstrate something. A boom microphone can sound more open and natural, provided it is placed carefully just out of shot.

Record a short test answer rather than relying on a soundcheck of a few words. Ask the guest to speak at the energy they will use in the interview, laugh once, turn their head and make any movements they are likely to make on camera. Listen for clothing rustle, chair creaks, plosives and room reflections.

In a working studio, a calm recording environment and experienced monitoring make a noticeable difference. At Yougig, green-screen sessions can be approached as a complete production – camera, lighting, sound and edit decisions working together rather than separate boxes to tick.

Give the guest a way to relax

Green screen can make people self-conscious because they cannot see the final scene around them. Explain what will replace the screen and show them a reference image before recording. A simple monitor preview can help, but do not let it become a distraction or encourage them to watch themselves while answering.

Keep the set clear, set the chair height before rolling and allow a few minutes for the guest to settle into the conversation. A strong answer rarely arrives on the first line. Start with an easy question, then return to the key question once their voice and posture have found a natural rhythm.

For interviews that need concise answers, ask guests to repeat part of the question in their response. Instead of answering, “About three years,” encourage, “I started producing music about three years ago.” That small adjustment makes the final edit clearer when the interviewer is not heard.

A green screen interview checklist before record

Before the first proper take, confirm these four areas together:

  • The green screen is evenly lit, clear of wrinkles and large enough for every planned shot.
  • The guest is separated from the screen, wearing tested clothing and framed for all required formats.
  • Camera exposure, focus, shutter settings and white balance are locked across every angle.
  • The microphone is clean, monitored and free from clothing noise, room echo and interruptions.

Do one final test with real movement. Ask the guest to gesture, lean forward and turn their head as they would naturally. Inspect hair edges, glasses, hands and any object they will hold. It takes a few minutes, and it is far easier than discovering a problem after the guest has left.

The most convincing green screen interview is built on ordinary, careful production choices: a relaxed speaker, clean sound, flattering light and a background chosen with purpose. Give those elements time on the studio floor, and the green screen stops being a special effect. It becomes a practical way to put a good conversation exactly where it needs to be.
Waterfront Recording Studio Review: Is It Worth It?

A waterfront recording studio review should begin with the thing that changes a session before a microphone is even switched on: how the space makes you feel. If you are used to windowless rooms, traffic outside and the clock starting the moment you arrive, stepping aboard a studio by the water can feel like a genuine reset. For bands, vocalists, presenters and content makers, that calmer headspace is not just a nice extra. It can affect confidence, focus and the quality of the take.

The setting alone is not enough, of course. A memorable location needs proper acoustic control, dependable recording systems and an engineer who understands what the project needs. The best waterfront studios pair the character of their surroundings with a serious, usable production workflow. Here is what is worth weighing up before you book.

What makes a waterfront recording studio different?

A conventional studio is designed to remove distractions. A well-run floating studio does that differently: it gives you physical distance from the usual noise without making the room feel sterile. The change of scene matters when a band has been rehearsing the same set for months, when a solo artist is trying to find the emotional centre of a vocal, or when a presenter needs to sound relaxed on camera.

There is also a practical creative benefit. Waterfront light, timber details and a distinctive exterior can turn a recording day into content day. Rather than treating video as an afterthought, artists can capture live performances, interviews, short-form social clips or a full multi-camera session in a place that already has visual character.

That said, atmosphere should never be confused with acoustics. Water may be peaceful, but recording rooms still need appropriate isolation, treatment and monitoring. Ask how the live room is set up, where the control or editing space sits, and whether the studio is designed to manage loud rehearsals as well as detailed vocal and acoustic work.

Waterfront recording studio review: the practical test

The most useful way to review a studio is to picture your actual session, from load-in to final files. A beautiful room is only worth booking if it supports the way you work.

Sound quality begins with the room

For a full band, the key question is whether the live room can cope with drums, amplified guitars and bass without turning everything into a blurred wash. You want enough space to perform naturally, sensible sightlines between players and a recording approach that captures energy without losing separation.

For singers, rappers, beatbox artists and voice artists, the priorities may be different. Listen for a dry, controlled vocal option, good microphone choice and monitoring that lets the performer hear detail without having to fight the backing track. The room should help you commit to a performance, not encourage endless fixing later.

A competent engineer will match the setup to the brief. A loud, punchy live video may benefit from a different mic placement and headphone mix than a layered release track intended for detailed mixing. There is no single ‘best’ sound. There is only a setup that is right for the song, voice or programme you are making.

Recording, video and livestreaming should work together

Many projects now need more than a finished audio file. An artist might need a rehearsal, a multitrack recording, a filmed performance and a few vertical clips from one session. A podcast team may want clean dialogue, a two-camera interview and edited extracts for a campaign. Booking separate rooms and crews for each stage adds cost and breaks creative momentum.

A studio with dedicated recording, editing and green-screen facilities can keep that process in one place. Multi-camera capture is particularly valuable for bands and performance-led creators because it preserves the real interaction between people in the room. Instead of miming to a later track, you can capture the take as it happens.

Livestreaming needs the same level of planning. A reliable broadcast is not simply a camera pointed at a performer. It depends on clean audio routing, camera framing, lighting, platform preparation and someone calmly watching the technical detail while you concentrate on the audience. Experience across live sound and broadcast production makes a noticeable difference here.

The engineer is part of the booking

A studio can have excellent equipment and still feel difficult if nobody helps the session move forward. For emerging artists, a good engineer provides reassurance without taking over. For established performers and commercial teams, they provide quiet efficiency: patching, gain staging, session organisation, backups and clear communication.

This is where a founder-led space can be especially useful. At Yougig, the combination of recording, multi-camera production and broadcast experience means projects can be approached as complete productions rather than isolated room hires. That is relevant whether you are tracking a new single, making a presenter-led film or broadcasting a live set.

The trade-off is that engineer-led time should be booked with a clear brief. Send references, rough demos, track counts, production requirements and any planned video outputs beforehand. The more the studio knows about the result you want, the less paid time is spent making avoidable decisions on the day.

What to check before you book

Waterfront locations can feel wonderfully removed, but they require a little more planning than a room above a high street. Confirm access for instruments and cases, parking or nearby unloading arrangements, toilet and refreshment facilities, and the route from arrival point to the live room. If you have a drum kit, amps, lighting or a larger crew, these details matter.

It is also worth checking the session format. Self-service rehearsal hire and engineer-led recording are different bookings with different outcomes. Rehearsal time is ideal for tightening arrangements, trying a new set and getting comfortable as a group. Recording time should include enough space for setup, soundchecks, performance takes, playback and file management.

For video work, agree the deliverables before the cameras roll. Are you receiving raw footage, an edited performance film, social edits, audio mixes or all of the above? If a green screen is involved, think about wardrobe and props. Certain colours and fabrics can complicate keying, while reflective surfaces may need extra lighting control.

Finally, be realistic about time. A single song recorded live can be quick if the band is prepared and the arrangement is settled. It can take much longer if you want layered overdubs, detailed editing, multiple camera angles and a polished final mix. A good studio will help you choose a session length that matches the ambition rather than selling you a vague promise of ‘a day’.

Who benefits most from the waterfront approach?

Bands looking for a rehearsal space with a route into recording are a natural fit. You can work out the arrangement in a proper live room, then capture it when the performance is ready. That continuity is valuable because the room, monitoring and workflow already feel familiar.

Solo artists can benefit just as much. A distinctive setting gives a vocal session or acoustic performance a sense of occasion, while technical support removes the pressure of having to operate everything yourself. For spoken-word creators, podcasters and presenters, the calmer atmosphere can help conversations sound less forced and more present.

It also works well for teams who need a professional finish without a sprawling production setup. A small brand can film an interview, record clean audio and create presenter content without moving between an audio studio, a video set and an editing suite. That is not always the cheapest route on paper, but it can be better value when it reduces coordination, travel and repeated setup time.

Is it worth choosing a floating studio?

It depends on your priorities. If you only need the lowest-cost place to make a quick demo, a straightforward rehearsal room may be enough. If you need the largest possible soundstage or an overnight residential lockout, a waterfront studio may not be the obvious choice either.

But if your project benefits from a relaxed environment, focused technical support and the option to create audio, video and live broadcast material in one memorable location, the format has real value. The setting can make performers feel more at ease, while the infrastructure ensures the result is more than a nice day by the water.

Book the room that suits the work, arrive prepared, and leave enough time for the moments when a performance stops feeling rehearsed and starts feeling true.

Video Production That Lets Performances Breathe

A great performance can disappear surprisingly quickly once a camera is switched on. The room feels different, a singer starts watching themselves in the monitor, or a band that sounded huge in rehearsal suddenly plays safe. Good video production is not about making every frame look expensive. It is about building a setup that lets the person in front of the lens forget the setup is there.

For musicians, presenters, podcasters and independent brands, that usually means making a few smart decisions before recording starts: what the viewer needs to feel, what must be heard clearly, and where the finished film will actually live. A full live session, a presenter-led green-screen piece and a social campaign may all use cameras, lights and editing, but they need very different approaches.

Video production starts before the cameras roll

The strongest shoots begin with a clear purpose, not a shopping list of equipment. Ask what one successful viewer should do after watching. They might listen to a new release, buy a ticket, understand a service, trust a spokesperson, or simply stay long enough to share the clip. That outcome shapes every creative choice that follows.

For a band, the brief may be to capture the energy of playing together in one room. In that case, the production should protect the performance: enough camera coverage to give the edit movement, clean multitrack audio for control later, and lighting that adds atmosphere without turning a rehearsal into a photo shoot.

For an interview, clarity may matter more than spectacle. A well-framed contributor, flattering soft light, consistent sound and an uncluttered background can carry the whole piece. For a product demo or presentation, a green screen can be useful when the background needs to change between versions, but only if the presenter is lit separately and the final visual treatment has been planned from the beginning.

A useful pre-production conversation covers the running order, wardrobe, intended platforms, key messages, references and deadlines. It also identifies practical issues early: how loud the room will be, whether playback is required, how many people are on set, and whether a live stream needs a reliable fallback recording. These details are not glamorous, but they are where calm sessions are won.

Choosing the right video production format

Not every project needs a large crew or a complicated set. The right format is the one that serves the audience and can be delivered consistently within the available time and budget.

A multi-camera live performance is ideal when the interplay between performers matters. Wide shots establish the room and the group, while tighter angles catch hands, expressions and musical cues. Recording the cameras at the same time as multitrack audio gives the editor options without asking artists to mime repeatedly. The trade-off is that camera positions, sightlines and lighting need more preparation, particularly in a busy live room.

A single-camera film can be more intimate. It works beautifully for an acoustic session, a stripped-back vocal, an artist introduction or a thoughtful interview. It is often faster to set up, although it may require several takes or a more deliberate edit if the finished piece needs visual variety.

For regular social content, the most efficient route is often to record a batch of short, focused pieces in one session. A creator might film an introduction, three tips, a performance excerpt and a callout for an upcoming release while the lights and sound are already set. Consistency across those clips helps an audience recognise the work, without making every post feel identical.

Livestreaming has its own demands. Viewers will forgive an occasional imperfect camera angle more readily than broken sound or a stream that drops halfway through. A proper live workflow needs monitored audio, tested internet, platform settings checked in advance, clear cueing and a recording of the programme where possible. The value of a live broadcast is its shared moment, so preparation gives everyone room to enjoy it.

Audio is half the picture

A film can survive a deliberately grainy image. It rarely survives muffled dialogue, harsh vocal sibilance or a live band mix that turns to mud on a mobile phone speaker. That is why serious video work for music and spoken word should treat sound as a production department, not an afterthought.

For performance video, recording each source separately makes a major difference. Vocals, guitars, bass, drums and playback can be balanced after the session rather than being locked into one room mix. A musician can then focus on delivering the song, while the final audio is mixed for the way viewers will listen: headphones, televisions, laptops and small mobile phone speakers.

Dialogue needs similar care. The best microphone depends on the setting. A discreet lavalier can suit a moving presenter, while a boom or close studio microphone may sound more natural for a seated interview. The room matters too. Hard surfaces can create reflections that make speech feel distant, whereas thoughtful positioning and acoustic control bring the voice forward.

At Yougig, the advantage of bringing recording and camera work together is simple: the sound and pictures are planned as one performance rather than stitched together afterwards. That matters whether the project is a loud full-band session, a beatbox showcase, a podcast film or a branded interview.

Build a set that supports the person on camera

There is a temptation to fill every corner of a frame with props, coloured lights and visual effects. Sometimes that is exactly right. A high-energy music video may need bold colour and movement; a launch film may need a carefully styled set. But visual interest should guide attention towards the performer or message, not compete with it.

Start with the background. A real studio space can add texture and credibility for artists, while a clean backdrop keeps the focus on a presenter. Green screen is especially useful when one recording needs several branded environments, graphics or locations. It is less useful when a natural setting would make the piece feel warmer and more believable.

Lighting should create separation and mood, while keeping faces readable. A key light gives the subject shape, a softer fill controls heavy shadows, and a back or edge light can lift them away from the background. The exact balance depends on the desired feel. A moody live session can carry more contrast than an instructional video, where viewers need to see expressions and details clearly.

Comfort is part of the technical plan. Give performers time to settle into the room, rehearse to the camera, check their framing and hear a playback they trust. The best take is often not the first technically correct one. It arrives after the performer has stopped thinking about the lens.

The edit is where the pace becomes clear

Editing is not merely trimming the beginning and end of a recording. It is where the film finds its rhythm. For music, cuts can follow the arrangement, a drum fill, a glance between players or the shift from verse to chorus. For interviews and promotional content, the edit should remove hesitation without stripping away the speaker’s personality.

It helps to decide early how long the film needs to be. A full performance might deserve four minutes. A teaser may only need fifteen seconds to earn a click. Trying to make one edit serve every platform usually produces a compromise, so it is often worth planning a main version alongside shorter vertical or square cutdowns.

Colour finishing also deserves attention. Cameras interpret skin tones, coloured stage lights and mixed daylight differently. A careful grade brings shots together, protects natural complexion and supports the intended atmosphere. The goal is not to make everything look artificially glossy. It is to make the image feel intentional.

Captions are equally practical. Many people first encounter video with sound off, particularly on social platforms. Clear captions make spoken content easier to follow and make a performance clip more accessible when lyrics or introductions carry the story. Keep them accurate, timed properly and placed where they do not cover important action.

Make room for the unexpected

The most memorable moment in a session is not always on the call sheet. It might be a laugh after a missed cue, an improvised ending, a presenter finding a more natural phrase, or a band landing a take with the kind of shared look that cannot be staged. A tightly organised production creates enough control to capture those moments rather than missing them.

That balance is worth protecting. Plan the camera coverage, check the audio, test the lights and know the deliverables. Then leave enough space for people to perform like people. When the room feels relaxed and the technical foundations are solid, video becomes more than proof that something happened. It gives an audience a reason to feel they were there.

Green Screen Studio for Natural-Looking Video

A presenter can be standing in front of a clean graphic one moment, a moving film clip the next, and a virtual waterfront view after that. The effect only feels effortless when the production behind it is properly considered. A green screen studio gives artists, presenters and brands room to create more than one backdrop in a single session, without building a different set for every idea.

For a music video insert, interview, training film, social campaign or livestream segment, green screen can be a practical route to a polished visual world. It is not magic, though. The quality of the final key depends on the screen, the lighting, the camera settings, wardrobe choices and the edit all working together.

What a green screen studio actually gives you

At its simplest, green screen production replaces the green background with another image, video or designed environment in post-production. That could be a branded graphic, a product demonstration, archive footage, a slide deck, an animated scene or a completely invented setting. Green is used because it is usually distinct from skin tones, making it easier for editing software to identify and remove.

The real value is control. Rather than chasing the right location, worrying about weather or rearranging a room between takes, you can focus on performance and framing. A single presenter-led shoot can produce a landscape film for a website, vertical clips for social channels and clean cut-downs for future campaigns. For musicians, it can also create visualisers, lyric content, announcement videos and striking performance layers without turning the main live room into a permanent set.

That flexibility comes with a trade-off. A green screen is not always the right answer for every film. If your message needs the warmth of a real workshop, the energy of a crowd or the texture of a location, shooting it for real may carry more weight. Green screen works best when the background adds useful context, can be designed with purpose, or would otherwise be costly and awkward to film.

Planning your green screen studio session

A good session starts with the final frame, not the green wall. Before cameras roll, decide where the finished video will be seen and what the viewer needs to notice. A talking-head film for LinkedIn needs different framing from a punchy vertical reel. A wide virtual set may look impressive, but it can leave a presenter small and disconnected on a phone screen.

Bring your background references early. They do not need to be finished artwork: a rough deck, a still image, a brand colour palette or examples of the mood you want will help shape the lighting and camera position. If graphics will sit beside the presenter, plan which side they will appear on. This avoids filming an excellent take only to discover the speaker gestures directly into the space needed for text.

Script length matters too. Green screen is often used for presenter content, and a calm, conversational delivery usually looks more convincing than reading dense copy at speed. Build in pauses for edits, especially where graphics or demonstration footage will appear. For an interview, agree whether the final setting should feel like a conventional studio, a branded environment or something deliberately stylised.

Allow space between subject and screen

The most useful piece of practical advice is also one of the easiest to overlook: keep the performer away from the screen. A little distance reduces green spill on hair, shoulders and clothing, and makes it easier to light the background evenly without flattening the subject.

This is particularly valuable for vocalists, beatboxers and musicians who move while performing. If someone is close enough to cast a strong shadow onto the backdrop, the key becomes harder to clean up. A dedicated, intimate setup can still work beautifully, provided the frame and movement are planned for the available space.

Lighting is what makes the key believable

A camera does not see a green screen as a single flat colour unless it is lit that way. Dark corners, hot spots, creases and shadows create variations that complicate the edit. The aim is an even green field behind the subject, then separate lighting for the person in front of it.

Treat the screen and the subject as two related but separate jobs. The screen needs balanced illumination. The presenter needs flattering light that suits their face, the desired mood and the final background. A cool corporate graphic, a bright product demo and a moody music visual may all call for different choices.

Hair is often the test. Fine detail around hair, glasses or translucent fabric needs careful lighting and a clean camera image. A subtle backlight can help separate the subject from the background, but it must be positioned with care so it does not create unwanted green reflections. This is where experienced camera and lighting support earns its place: the goal is not merely to remove green, but to make the finished composite look like it was meant to exist.

What not to wear on green screen

Avoid green clothing, naturally, but also watch for shiny jewellery, reflective glasses and highly glossy fabrics. These can pick up green spill and create awkward edges in post. If a brand colour happens to be green, it does not rule out the shoot, but it may mean using a different background method or adjusting the wardrobe and framing.

Fine patterns can also cause trouble on camera, especially tight stripes and small checks. Bring two or three outfit options if the shoot matters. A quick camera test is far better than discovering the problem once the edit is underway.

Camera choices affect the final composite

Green screen rewards a clean, well-exposed image. Compression, digital noise and motion blur make the edge between person and background less precise. That does not mean every project needs an elaborate cinema setup. It means the capture format, lighting and camera settings should match the finish you are aiming for.

Keep shutter speed sensible for the movement in shot. A presenter delivering to camera can usually be captured cleanly, while fast hand movements, dancing or performance work may need more attention. If the background is intended to move with the camera, the job becomes more complex and may involve tracking. For many social, corporate and interview films, a locked-off or carefully controlled camera delivers the strongest result for the budget.

Multi-camera filming can be useful when you need pace and coverage. A wide shot creates room for graphics, while a closer angle captures connection and detail. The important point is consistency: each camera needs matching exposure, colour and screen coverage, otherwise the edit becomes a series of compromises.

The edit is where the background earns its place

Removing the green is only the first stage. A convincing composite needs the foreground and background to share a visual logic. If a presenter is warmly lit but stands in front of a cold virtual office, the result can feel pasted together. Colour correction, subtle shadows, scale, depth and the right amount of background movement all help the picture settle.

Less is often more. A busy animated backdrop can compete with an interviewee, and dramatic virtual scenery may date quickly if it is used for everyday brand communications. Clean branded environments, well-chosen footage and graphics with breathing room tend to give content a longer useful life.

Sound deserves equal attention. Viewers may forgive a simple visual setting, but poor dialogue, room noise or inconsistent levels will pull attention away immediately. Recording clear sound alongside the video means a green screen piece can hold up across a website, livestream, presentation screen and social feed.

At Yougig, the advantage is having green-screen production, multi-camera capture, audio recording and post-production thinking in one calm waterfront setting. You can arrive with a rough idea and leave with a shoot designed around what the final content needs to do, rather than a room full of kit and a list of unanswered questions.

Make the screen serve the message

The strongest green screen films do not use a digital background simply because they can. They use it to clarify an idea, place a performer in the right visual world or give one session a useful range of outputs. Start with the audience, plan the finished frame, and give the performance enough space to feel natural. The green disappears in the edit, but the confidence of a well-made film stays with the viewer.

Live Sound Recording That Feels Like a Performance

A great take often happens just after a band stops trying to make one. The singer turns towards the drummer, the groove settles, and a small imperfection makes the chorus feel human rather than assembled. Live sound recording is about preserving that moment without letting technical distractions flatten it.

For bands, vocalists, beatbox artists and performers, recording live can be the difference between a track that sounds correct and one that feels convincing. It asks more from the room, the monitoring and the engineer than recording every part separately. It also gives you something hard to manufacture later: real interaction.

What live sound recording actually captures

Live sound recording means capturing performers playing together, in the same session, rather than building a production one isolated layer at a time. That may mean a full band in one room, a singer and guitarist performing face to face, or a rapper delivering to a beat while a beatbox artist creates live textures beside them.

It does not have to mean abandoning control. A well-planned session can record separate microphone channels for each instrument while retaining the shared performance. This is multitrack live recording: everyone plays at once, but the mix can still be shaped afterwards. A vocal can be balanced, a guitar part can be softened, and a drum kit can be given the space it needs without losing the timing and communication that happened in the room.

The trade-off is simple. More separation gives the mix engineer greater freedom, while more bleed between microphones often delivers a more natural, connected sound. Neither approach is automatically better. A loud rock band may need careful isolation and close miking. An acoustic trio may benefit from hearing more of the room and each other.

The room is part of the recording

A live room is not just somewhere to put amplifiers. Its size, surfaces, ceiling height and acoustic treatment all affect what reaches the microphones. A room that feels comfortable to play in usually helps performers relax, but comfort alone is not enough. You need a space that can handle volume, keep unwanted reflections under control and allow clear sightlines between players.

For a drummer, the room can add weight and excitement to cymbals and toms. For a vocalist, too much hard reflection can make a performance harder to pitch and harder to mix. For guitarists, amp placement matters as much as amp settings. Moving an amplifier half a metre, angling it away from a reflective wall, or lifting it from the floor can change the recorded result significantly.

This is why a quick soundcheck should be treated as part of the creative process, not dead time before the real work begins. Play a section at proper performance level. Walk around the room. Listen for rattles, harsh cymbals, booming bass notes and headphone spill. Solving these issues before recording is faster and cheaper than trying to disguise them in editing.

At Yougig, the large live recording room and separate digital mixing suite make it possible to keep the performance moving while the technical side stays properly managed. The floating-studio setting also offers something many conventional rooms do not: a calm change of scene that lets people arrive, settle and focus on the work.

Build the headphone mix around confidence

Performers do not need identical headphone mixes. In fact, giving everyone the same balance is one of the quickest ways to make a live session feel uncomfortable.

A singer may need the vocal slightly louder, with enough reverb to perform naturally but not so much that pitch becomes vague. A drummer may want more bass and a strong guide vocal. A guitarist may need less of their own amp than expected and more kick drum to lock in. The best cue mix is the one that makes each person play with confidence.

Agree on a communication method before the first full take. It can be as simple as a talkback microphone and clear hand signals. If someone needs less click, more vocal or a restart, that should be easy to ask for without shouting across the room. Tiny interruptions become frustrating when they are repeated ten times.

Clicks are useful, but they are not compulsory. If the song needs a tempo map, programmed elements or later overdubs, a click is usually sensible. If the arrangement breathes around the vocal and the band has a strong internal pulse, recording without one may produce the better performance. The decision should serve the song, not the spreadsheet.

Microphones should serve the source

There is no single microphone list that guarantees a professional live recording. The right choice depends on the voice, instrument, volume, arrangement and room. What matters most is that each microphone has a purpose.

Close microphones give focus and control. They are particularly useful on drums, guitar cabinets and louder vocal performances. Room microphones add scale, depth and a sense of place, but they should be positioned with intention. If the room sounds exciting, capture it. If it sounds cluttered, prioritise cleaner close signals and create ambience during mixing instead.

Phase is one of the less glamorous details that makes a large difference. When multiple microphones hear the same source at slightly different times, some frequencies can cancel each other out. The result may be a snare that loses punch or a guitar tone that feels strangely thin. Checking polarity, microphone distance and the relationship between drum mics before committing to long takes protects the energy you worked to create.

A good engineer will also leave enough headroom. Digital recording is forgiving in many ways, but clipped transients are not musical. A take can be loud later. It cannot be repaired easily if the loudest chorus has distorted on the way in.

Rehearse the recording, not just the songs

Knowing a song and being ready to record it live are related but different things. The band should know where intros end, how long stops last, who gives the count-in and what happens if a string breaks or a verse goes wrong. These details sound obvious until a brilliant take collapses because everyone made a different decision at the same moment.

Use rehearsal time to test transitions at performance level. If backing vocals only arrive in the final chorus, practise how the singers move towards their microphones. If a keyboard player changes sounds, check that the patch is ready before the bar where it is needed. If the song has a dramatic ending, decide whether it finishes cleanly, rings out, or leaves room noise as part of the atmosphere.

Recording two or three complete takes can be more productive than spending an hour correcting a tiny section. Full takes reveal the arc of a performance. They also give you options: the urgency of take one, the tightness of take two, and perhaps a perfect final chorus from take three. Punch-ins have their place, but they should support a strong performance rather than replace one.

Leave room for the human details

The most shareable live sessions often contain details that would be removed from a heavily polished studio production: the drummer’s breath before a fill, a guitarist’s fingers shifting on the fretboard, a brief smile between performers. The point is not to make a recording messy. It is to avoid sanding away everything that proves real people were in a room, making a decision together.

That applies to live video too. A multi-camera capture can preserve eye contact, movement and the build-up before a chorus in ways that a finished audio track cannot. When audio and video are planned together, microphone positions, cabling, lighting and camera angles can be organised before the first take, keeping the room clear and the session focused.

Give the mix a clear brief

Once the performance is captured, mixing should reinforce its character. Tell the engineer what you want listeners to feel, not only which records you admire. Do you want the vocal intimate and close? Do you want the drums to feel like they are in the room with the listener? Should the bass be warm and rounded, or sharp enough to carry a live electronic arrangement?

Reference tracks can help, but they are a starting point rather than a set of instructions. Your arrangement, voices and room are different. A mix that works for a sparse acoustic performance may not work for a six-piece band with dense guitars and layered backing vocals.

Leave time to listen back away from the live room. A track that feels enormous on studio monitors may reveal a harsh vocal or overbearing cymbals on headphones. Check a sensible range of playback systems, then make changes carefully. Chasing every difference between speakers can lead to a mix with no centre of gravity.

The useful question at the end of a session is not whether every tiny flaw has disappeared. It is whether someone hearing the recording can feel why the performers wanted to play that song together. Set up the room, make the monitoring personal, and give yourselves enough complete takes for that answer to come through.

When an Audio Restoration Service Is Worth It

A cassette from a first gig, a reel of a relative telling stories, a vinyl recording of a band that never made it to the studio – these are not just old formats. They are moments that may exist nowhere else. A professional audio restoration service gives those recordings the best possible chance of being heard again, without stripping away the character that made them worth keeping.

Restoration is not about making every archive sound like a current chart release. It is about stabilising fragile material, reducing distractions and revealing what is already there. Sometimes that means a dramatic improvement. Sometimes the right result is a gentle clean-up that leaves a little hiss, hum or room sound in place because removing it further would damage the voice, performance or atmosphere.

What an audio restoration service can actually do

The process begins long before any plug-in is opened. Old media needs to be assessed for its physical condition and played on suitable equipment. Cassettes can suffer from stretched tape, sticky residue, worn pads and damaged shells. Reel-to-reel tape may need careful handling before playback. Vinyl can carry clicks, crackle and groove wear, while old digital files may have low bitrates, clipping or transfer errors already baked in.

Once a clean, high-resolution transfer has been captured, restoration work can address issues such as persistent hum, electrical buzz, broadband hiss, clicks, crackles, dropouts, uneven levels and excessive background noise. Speech recordings often benefit from clearer vocal presence and more even loudness. A live gig recording may need audience noise reduced between songs, low-end rumble controlled and the overall balance brought into shape.

There is a difference between repair and reinvention. If a voice is buried beneath distortion, or a guitar was never recorded clearly in the first place, no honest engineer can promise to recreate every missing detail. Modern processing can be remarkably helpful, but it cannot reliably turn a poor mono cassette into a pristine multitrack session. The value lies in making considered decisions, preserving the original and avoiding processing that sounds impressive for ten seconds but tiring for a full track.

The right restoration depends on the recording

A family interview, a DJ mix from the 1990s and a live band demo have different priorities. For spoken-word material, intelligibility usually comes first. The engineer may reduce steady noise, tame harsh consonants, soften handling sounds and lift quiet sections so listeners are not constantly reaching for the volume control.

For music, the goal is often more delicate. Tape hiss may be less distracting than the watery, swirly artefacts created by aggressive noise reduction. Vinyl crackle can be removed one click at a time in particularly exposed passages, while retaining enough high-frequency detail for cymbals and acoustic instruments to feel natural. With a live recording, some crowd sound can be part of the occasion. Taking it all away may make a real performance feel oddly empty.

That is why a good restoration session includes listening rather than applying one standard chain to every file. The best treatment for a single vocal archive may be entirely wrong for a full band recording. It also helps to decide where the restored audio will be heard. A file intended for a family archive has different delivery needs from a release, podcast extract, film soundtrack or social clip.

What restoration cannot safely fix

Some limitations are physical. Mould, badly creased tape, missing sections, severe tape degradation and deeply worn record grooves may limit what can be recovered. Other problems are embedded in the original recording: clipped digital audio, a microphone placed too far from the speaker, or instruments all captured through one distorted cassette mic.

Careful processing can reduce the impact of these faults, but pushing too hard creates new ones. Speech can start to sound synthetic. Cymbals can become smeared. Quiet passages can pulse unnaturally as software chases the noise floor. A professional result is often one where the listener notices the story or song, not the restoration.

Prepare your archive before it comes into the studio

Do not test a precious tape repeatedly on an old player in the loft. Every pass can add wear, and a machine with dirty heads or poor transport can make matters worse. Keep media dry, away from magnets, direct sunlight and large temperature swings. If a cassette shell is cracked, a reel is shedding material, or a tape smells musty, leave it as it is and flag the condition before transfer.

Gather any useful context too. A note with names, dates, track order, speed, tape format or known faults can save time and prevent incorrect playback. If you have more than one copy, bring them all. One cassette may be less worn in a particular section; one record pressing may have fewer clicks on a favourite track.

For existing digital files, send the highest-quality original available rather than a file forwarded through messaging apps or downloaded from a social platform. WAV or AIFF files are preferable where possible, but an old MP3 can still be worth restoring if it contains something irreplaceable. Keep the original untouched and make restoration work from a copy.

Why the transfer matters as much as the clean-up

The first digital capture sets the ceiling for everything that follows. Playback speed, tape alignment, record stylus condition, gain staging and analogue-to-digital conversion all affect the result. A poor transfer can introduce wobble, noise or distortion that later processing cannot truly remove.

This is particularly relevant with ageing analogue formats. A cassette recorded on one machine may play slightly differently on another, and a reel recorded at an unusual speed needs to be identified correctly. Engineers may make test captures, compare levels and adjust the playback path before committing to the final transfer. It is patient work, but that patience protects material that may have waited decades to be heard again.

At Yougig, analogue-to-digital remastering can sit alongside detailed editing, mixing and mastering in a production environment built for critical listening. That means an archive can be transferred, restored and supplied in sensible formats without treating it as an afterthought between larger sessions.

Ask for a result you can live with

Before work starts, describe what is bothering you most. Is the hiss masking a voice? Are clicks pulling attention from a piano piece? Is the recording too quiet, too boomy or difficult to understand in the car? A clear priority helps guide the decisions.

It is also worth asking for both a restored version and an untouched archival transfer. The clean version is the one you will likely share and enjoy. The flat transfer preserves a faithful digital record of the source, giving you options if restoration tools improve or your needs change later.

Where possible, listen to a short sample before the whole project is processed. This is the moment to say whether you prefer a cleaner sound or a more natural, lightly restored one. There is no single correct amount of hiss, warmth or ambience. There is only the version that serves the recording and the people who will hear it.

A carefully restored recording does more than remove noise. It makes space for the laugh before the chorus, the imperfect first take, the voice of someone no longer in the room. Bring the best source you have, keep expectations honest, and let the history in the recording lead the work.

How an Interview Filming Studio Shapes Better Talks

A strong interview can be derailed by something as small as a noisy air conditioner, an uncomfortable chair or a guest who cannot work out where to look. The right interview filming studio removes those distractions before the cameras roll. It gives the conversation room to breathe, while the production team captures every answer with the sound, framing and flexibility needed for a polished final film.

For a founder interview, artist profile, podcast episode, panel conversation or presenter-led campaign, the setting is not just background. It affects how people speak, listen and connect. A studio should feel prepared without feeling stiff: technically capable enough for broadcast-quality delivery, but calm enough that your guest can forget the kit is there.

What an interview filming studio needs to get right

Interview content often looks simple from the outside. Two people sit down and talk. In practice, it is one of the formats where small production choices are highly visible. Viewers notice echo, inconsistent lighting, awkward eyelines and edits that feel like jumps, even if they could not explain why.

Clear audio comes first. People will tolerate a less-than-perfect image for longer than they will tolerate muffled speech or a room full of reflections. A treated recording space, well-positioned microphones and an engineer monitoring levels give the editor clean dialogue to work with. This matters particularly when a guest speaks quietly, laughs loudly, moves in their chair or has a naturally expressive delivery.

Lighting should be shaped for faces rather than simply switched on. A flattering key light, gentle fill and controlled separation from the background can make a guest look relaxed and present without creating a glossy, overproduced result. The best approach depends on the brief. A leadership interview may call for a composed, editorial look; a musician talking about a new release may suit something more textured and informal.

Camera coverage is what makes an interview usable beyond a single long-form edit. A wide two-shot establishes the conversation, while individual angles give the editor places to cut naturally. A close shot can hold a moment of reflection. A wider frame can make room for hands, instruments, products or a more animated exchange. Multi-camera filming also means a powerful answer does not need to be repeated because the other speaker happened to be on screen.

Comfort is a production decision, not an extra

Guests are rarely at their best when they arrive in an unfamiliar room, face a bright light and are told to speak directly to a lens. A good studio team creates a gentler landing. There is time to settle in, check the seating, talk through the format and make sure everyone knows where to look.

This is particularly valuable for first-time presenters, artists more used to performing than being interviewed, and clients discussing personal or complex subjects. The goal is not to make people forget they are being filmed through clever tricks. It is to make the process feel clear, respectful and well held.

The physical space plays a part too. A clinical meeting-room look can be right for some corporate productions, but it is not the only option. A more characterful environment can help conversations feel warmer and more human, provided it does not compete with the subject. Backgrounds need depth, texture and enough visual order to keep attention where it belongs.

At Yougig, the floating studio setting in Shoreham-by-Sea offers a useful balance: a distinctive waterfront atmosphere outside, with controlled recording, editing and green-screen spaces inside. For many guests, stepping aboard changes the pace before the first question is asked.

Plan the conversation before choosing the camera angle

The strongest interview films begin with an editorial purpose, not a shot list. Decide what the audience should understand, feel or do after watching. That decision informs the questions, the set, the camera treatment and the eventual cut.

A short social campaign may need concise answers that work as individual clips, with clean pauses around key lines for captions and titles. A documentary-style conversation may benefit from longer silences, follow-up questions and a more observational visual style. A recruitment film often needs clarity and warmth, while a product interview may need space for demonstrations or cutaway detail.

It helps to share this purpose with the studio team in advance. They can advise on the practical implications: whether the shoot needs one host or two, a remote contributor, a teleprompter, green screen, product close-ups, screen capture or a live audience feed. This is where an experienced production partner can save time. A format that sounds straightforward on paper can require very different lighting, audio routing and camera positions once people are in the room.

Eyeline changes the feeling of the film

Where a guest looks has a major effect on tone. Looking slightly off-camera towards an interviewer often feels conversational and intimate. Speaking straight into the lens creates direct address, which can work beautifully for a message to customers, supporters or an online audience.

Neither is automatically better. Mixing both without a clear reason, however, can feel unsettled. Decide early whether the viewer is meant to feel like a third person in the room or the person being spoken to. That single choice helps the director, interviewer and contributor work from the same plan.

Why multi-camera filming protects the edit

A one-camera interview can be elegant, economical and entirely suitable for a simple, carefully delivered piece. It also asks more of the contributor and the editor. Any stumble, repeated answer or lengthy pause has fewer places to hide.

Multi-camera recording offers practical insurance. It captures reactions, gives natural edit points and lets the conversation continue when a question needs rephrasing. It is especially useful for two-person interviews, panel discussions and podcasts where timing and response are part of the story.

There is a trade-off. More cameras require more setup, monitoring and coordination, so they are not necessary for every brief. But when the film will be cut into a long episode, shorter highlights and vertical social clips, additional coverage often earns its place. It gives the finished content a more considered rhythm without forcing the interview into a rigid performance.

A studio with both filming and post-production capability also keeps that workflow joined up. The people recording the interview understand what has been captured, what the client needs and where the edit can go next. Audio can be cleaned, colour can be balanced, captions can be prepared and versions can be shaped for the platforms that matter to the campaign.

Build a set that supports the person on screen

A set does not need expensive furniture or elaborate scenery to look intentional. It needs control. Colours should suit skin tones and the brand without creating distractions. Props should reveal something useful about the guest, the project or the organisation, rather than appearing as decorative clutter.

For recurring content, consistency matters. The same seating position, framing, lighting and background give a series a recognisable identity. That does not mean every episode must look identical. A well-planned studio can retain a core visual language while adjusting elements for different guests, products or themes.

Green-screen filming is a useful option when the background must change between versions, when branded graphics carry much of the message or when there is no practical way to build the required environment. It requires careful lighting and clean separation around the subject, so it works best when planned from the start rather than added as an afterthought.

Questions to settle before the session

Before booking an interview filming studio, be clear about the number of contributors, intended running time, output formats and whether the interview will be live or recorded. Let the team know if anyone will join remotely, if a guest has access requirements, or if the content includes music, demonstrations or sensitive subject matter.

Bring a question structure, but avoid scripting every answer. The best remarks usually arrive after a follow-up question or an unexpected detail. Leave enough time for sound checks, a quick visual test, natural breaks and a final review of anything that must be said accurately.

If you need several clips from one session, plan for that too. Ask for a mix of broad ideas, specific practical answers and concise standalone statements. A considered hour in the chair can become a useful library of content rather than one film with a short shelf life.

The camera may capture the interview, but the real work is creating the conditions for someone to say something worth hearing. Choose a space that lets your guest settle, your team stay focused and the conversation find its own rhythm.

Beatbox Recording Studio Sessions That Hit Hard

A beatbox recording studio session can expose every detail: the snap at the front of a kick, the air around a hi-hat pattern, the low-end weight of an inward bass and the tiny shifts that make a groove feel human. That is exactly why beatbox deserves more than a quick vocal take on a single mic. With the right room, gain staging and performance plan, vocal percussion can sound huge without losing its character.

For a solo artist, crew or producer building a track around beatbox, the aim is not to make everything artificially clean. It is to capture a confident performance with enough control to shape it later, whether the final destination is a release, a live session video, social content or a full multitrack production.

What a beatbox recording studio needs

Beatbox sits in an unusual place between vocal recording and drum recording. It has the intimacy of a close vocal, but it can create sudden transients and serious low frequencies. A studio that only treats it like spoken word can leave kicks thin. One that treats it like a loud drum kit can lose the mouth detail, breathing and articulation that make the performance recognisable.

The starting point is a properly controlled live room. You want enough space to perform freely and move with the rhythm, without a harsh room reflection returning into the microphone. A dry, focused capture gives the mix more options. Space and character can be added later; unwanted room tone is much harder to remove once it has been recorded.

Good monitoring matters just as much. Beatboxers often change their tone instinctively in response to what they hear in headphones. A clear, comfortable headphone mix helps you feel the sub-heavy elements, catch the timing of loops or backing tracks, and avoid pushing too hard simply to hear yourself.

At Yougig, the large live room and separate digital mixing suite allow the performance and the critical listening to happen in the right places. That distinction is useful: record with energy first, then make careful decisions about edits, balance and polish without rushing the creative moment.

Choose the microphone around the performance

There is no single best microphone for every beatbox artist. Your sound, volume and technique decide the setup. Some performers work extremely close to the grille, using proximity effect as part of their low-end sound. Others need a little more distance to deliver fast patterns, lip rolls and outward snares without overloading the capsule.

A dynamic microphone can be a sensible first choice for an energetic, close-up performance. It handles high sound pressure well and often keeps the capture direct and punchy. A condenser may reveal more texture, breath and high-frequency detail, but it can also pick up more room, mouth noise and explosive consonants. The better option depends on the arrangement and how controlled the room is.

A pop shield is not optional decoration here. Plosives from kicks and bass sounds can create a large burst of air that makes even a good take difficult to use. Positioning the artist slightly off-axis, rather than directly firing air into the microphone, can retain impact while reducing those disruptive blasts.

The engineer should set a safe recording level before the full take begins. Ask the performer to deliver their loudest kick, snare and bass sounds, not just a conversational warm-up. Leave headroom. It is far better to raise a clean recording in the mix than to repair clipped peaks from an otherwise brilliant take.

Try a second mic when the arrangement calls for it

A second microphone can be useful, but it is not automatically better. One close mic may capture the main body of the performance while a second, slightly wider mic adds articulation or natural room depth. This can work well for live videos and stripped-back performances where the viewer should feel the physicality of the set.

The trade-off is phase. Two mics hearing the same source at different distances can weaken the low end if their signals do not align well. An experienced engineer will check this before recording the session, rather than discovering it when the mix is already underway. If the goal is a dense, highly layered production, a clean single-mic foundation is often the most flexible choice.

Record the full performance before building layers

It is tempting to construct beatbox one sound at a time: kicks first, then snares, then hats, then bass. That approach can produce a detailed result, but it may miss the push and pull that makes a live beatbox pattern compelling. Start by recording complete performances from beginning to end.

A full pass captures phrasing, dynamics and transitions naturally. It also gives you a reliable reference when layering. Once a strong master take is in place, you can add focused overdubs where they genuinely improve the track – perhaps a deeper bass phrase, a sharper snare, a vocal hook or a rhythmic texture that would be difficult to perform at the same time.

For loopstation artists, capture a clean direct feed where possible alongside the room performance. The direct signal preserves the exact loop balance created in the moment, while a microphone in the room can retain the live presence and audience-facing energy. Neither version replaces the other. Together, they offer useful choices in the edit.

If you are recording with a producer, agree the session order before the first take. Record the most demanding material while your lips, tongue and breathing are fresh. Leave experiments, doubles and spoken transitions for later. Beatbox can be physically tiring, especially when repeated low-end sounds demand a lot of air support.

Build punch without flattening the groove

Editing beatbox is a balancing act. Tight timing can make a production feel powerful, but excessive correction can turn a personal performance into a sterile grid. Small timing differences between a kick, snare and breath may be exactly where the groove lives.

Start with arrangement. Remove sections that repeat without adding energy, and let the strongest pattern have room to land. Then address obvious distractions: an accidental bump, a clipped breath, a stray syllable or a gap that breaks the rhythm. Detailed edits should support the performance, not replace it.

In the mix, different frequency areas often need separate attention. The kick and bass elements need weight, but uncontrolled low frequencies can swallow the snare and make the whole track feel cloudy. Presence helps clicks, hats and consonant textures cut through, although too much top end can make mouth sounds tiring over a full track.

Compression is useful when it is responding to a purpose. Gentle control can help a beatbox take sit steadily alongside music, while more characterful compression can exaggerate the punch of a live pattern. Push it too far and the natural transient shape disappears. It depends on whether you are making an intimate vocal-led piece, a bass-heavy track or a performance film designed to feel immediate.

A clean recording also makes effects more exciting. Short room ambience can give a dry pattern dimension. Delay can turn a vocal texture into an arrangement element. Creative pitch and formant processing can be brilliant in the right section, but the unprocessed take should still have enough authority to carry the song.

Make the session work on camera too

Beatbox is visual. The audience sees breath control, hand movements, concentration and the moment a complex rhythm locks in. A multi-camera live capture can turn a recording session into material for releases, reels, a performance channel or a pitch to promoters.

Plan the shot around the performer rather than treating video as an afterthought. A close angle can show technique and expression; a wider frame gives movement and a sense of room. If you are working with a loopstation, hands and controls need coverage too. Capture clean multitrack audio separately, then pair it with the strongest visual performance in the edit.

For presenter-led breakdowns, tutorials or artist interviews, a green-screen setup offers another route. You can film a short explanation of your sound design or process alongside the main performance, then create visual assets that feel connected rather than generic.

Arrive ready, leave with options

Bring reference tracks, a clear idea of your intended release format and any backing sessions or loop files you plan to use. If you rely on a particular handheld microphone, pedal or loopstation, bring it and mention it before the session so the routing can be prepared. A short soundcheck is the right time to test distance, level and monitoring, not when the best take is already happening.

Most of all, leave room for one unexpected pass. The take after the planned take is often where a beatbox artist stops analysing technique and simply performs. Give that moment a well-prepared room, a trusted engineer and enough recording time to let it happen.

Drum Recording Studio Hire That Gets the Take

A great drum take is physical. It is the kick drum moving air, the cymbals opening up at exactly the right moment, and a player feeling confident enough to stop thinking about the red light. Drum recording studio hire should give that performance room to happen, not force it into a cramped, over-treated space or a rushed setup.

For bands, solo artists and producers, recording drums is often the point where a track stops being a demo and starts sounding like a record. It also tends to be the session that needs the most planning. The room, kit, microphones, engineer, headphone mix and schedule all affect the result. Get those basics right and the session can feel surprisingly relaxed.

What to look for in drum recording studio hire

The first question is not simply whether a studio has microphones. Most professional rooms do. The useful question is whether the live room suits the sound you want to make.

A lively room can give a rock, indie or soul recording scale and character, with room microphones adding movement around the close-miked kit. A more controlled room can be the better choice for detailed pop production, tightly edited arrangements or voice-led tracks where the drums need impact without a long natural tail. Neither approach is automatically better. It depends on the song, the drummer and how much of the sound you want to commit to on the day.

Space matters too. A drummer needs enough room to play without feeling boxed in, while the engineer needs enough separation and control to capture clean, flexible tracks. If the whole band is recording live, ask how sightlines, spill and headphone monitoring will be managed. A little spill can make a performance feel connected. Too much can limit editing and overdubs later.

A serious recording space should also have a proper monitoring and control setup rather than treating the live room as an afterthought. The best sessions move easily between playing, listening back, making a small adjustment and going again. That flow keeps a band focused on the music rather than waiting around while technical decisions are made.

The room is part of the instrument

Drums do not sound the same in every space, even with the same player, kit and microphones. Ceiling height, surfaces, absorption and room dimensions all shape the low end, cymbal detail and sense of depth.

Before booking, describe the references you have in mind in practical terms. Do you want a dry, punchy snare that can sit under dense guitars? A broad, open kit for a live session video? A close, modern sound with enough room ambience to blend in later? These descriptions give an engineer something useful to work from. Naming a favourite record can help too, but the aim is to identify qualities rather than chase an identical sound.

Decide whether to bring your own kit

Your own drums are familiar. You know the response of the heads, where the snare sits under your hands and how hard you can lean into the cymbals. That comfort often produces a better performance, especially if you have recently rehearsed the material on that kit.

Still, the condition of the instrument is more important than its history. Worn heads, rattling hardware, poorly seated cymbals or an unfocused kick drum can cost valuable session time. Fresh heads are not compulsory for every recording, but if the current set has had a long rehearsal life, changing key batter heads before the session is usually sensible. Bring a tuning key, spare snare wire straps or cords if you use them, sticks, mallets and any percussion that belongs in the arrangement.

If hiring or using a house kit, ask what is included and what you should bring yourself. Cymbals are particularly personal, so many drummers prefer to bring their own even when using a studio shell pack. It is worth agreeing the setup in advance, especially if you need a left-handed layout, double pedal, auxiliary snare, electronics or a larger cymbal arrangement.

Prepare the songs before the clock starts

The most cost-effective recording day is not the one with the shortest booking. It is the one where the band arrives able to make decisions quickly.

Rehearse the exact arrangements you intend to record. That means agreeing where fills land, whether the final chorus lifts, how long the intro lasts and what happens after the last hit. If a part is meant to feel loose, decide what the band is being loose around. A shared map prevents the kind of vague uncertainty that leads to twenty near-identical takes.

Tempo deserves attention. Even players with excellent internal time can benefit from testing each song against a click before the studio date. You may decide to record to one, use a simple guide percussion track, automate tempo changes or avoid a click entirely. The right choice is musical, not ideological. A song that pushes and pulls naturally may lose life when forced to a grid, while a production built from layers and edits will be easier to finish if its foundation is stable.

Send rough demos and notes ahead where possible. Include the song order, tempos, keys, arrangement notes and any moments that need special attention. If there is a reference for the drum sound, mention it. A little preparation lets the engineer plan microphone choices and session layout before you step aboard.

Work with the engineer, not around them

An experienced engineer is listening for more than a technically clean signal. They are judging tuning, balance across the kit, cymbal volume, pedal noise, phase relationships and how the drummer’s dynamics translate into the room. Their job is not to remove personality. It is to capture it in a form that will still work once guitars, vocals and production choices arrive.

Use the soundcheck to play as you will perform. Do not tap the snare delicately and then hit it twice as hard on the take. Play a verse, chorus and fill with proper intent so levels and microphone placement can be set for the reality of the song.

Be open to small changes. Moving a ride cymbal, damping a ringing tom, changing snare tuning or shifting the kit a little in the room can solve an issue faster than trying to repair it later in the mix. Equally, say something if the monitoring is not working for you. A drummer who cannot clearly hear the click, guide track or talkback is being asked to perform with one hand tied behind their back.

At Yougig, a large live recording room and dedicated digital mixing suite make it possible to track drums with the attention they need, then assess the result properly before committing to the next song. For projects that need more than audio, the same performance can also be planned as a multi-camera capture rather than recreated after the fact.

Allow enough time for setup and real performances

A drum session has a rhythm of its own. Load-in, building the kit, tuning, microphone placement, line checks and headphone mixes happen before the first usable take. Rushing this stage is a false economy, particularly if you are recording several songs.

For a focused single, you may be able to set up, capture the main take and record alternatives in one well-planned session. An EP or album deserves more breathing room. Some songs settle after a few takes; others reveal a problem only when the full arrangement is played at performance level. Build time for listening back, breaks and a second attempt after a useful adjustment.

It is also wise to record options while the kit is miked up. Capture a clean ending, a separate cymbal swell, a tom fill without the band, or a simpler verse pattern if the arrangement is still evolving. These are not signs of indecision. They are practical choices that can save a return booking during editing and mixing.

Think beyond the recording day

Ask what you will receive at the end of the session and how the files will be organised. Clearly labelled multitrack audio gives you freedom to mix elsewhere, revisit the track later or share the project with collaborators. If the studio is mixing the track, talk about the intended direction early, including how natural or processed you want the drums to feel.

Video can be worth considering at the same time. A compelling live drum performance is valuable material for release campaigns, social clips, electronic press kits and content that shows a real band playing rather than another static studio image. Capturing it on the day is usually more honest and efficient than miming to a finished track weeks later.

The right studio hire is not just a room booked by the hour. It is a chance to create a dependable foundation for the entire record. Arrive prepared, give the drummer time to settle, and leave space for the unexpected take that makes everyone in the control room look up.

Audio Mastering for Musicians That Travels Well

A finished mix can sound brilliant in the room, then lose its footing the moment it reaches a mobile phone speaker, a car stereo or a streaming playlist. Audio mastering for musicians is the final quality-control and presentation stage that helps a track hold together beyond the studio, without sanding away the character that made the performance worth recording.

For independent artists, mastering is sometimes treated as a mysterious polish applied at the end of a project. In reality, it is a set of careful decisions about tone, dynamics, level, stereo width and consistency. Done well, it lets the listener hear the intention of your mix more clearly. Done badly, it can turn an open, exciting recording into something brittle, flat or tiring.

What audio mastering for musicians actually does

Mixing shapes the relationship between the parts of a song. It decides whether the vocal sits above the guitars, how hard the kick lands, where the reverb lives and how a chorus expands. Mastering works on the completed stereo mix, or on a group of finished mixes for an EP or album. Its job is to make the final programme translate reliably and feel coherent as a release.

That can involve subtle equalisation to correct an overall tonal imbalance, controlled compression to tame peaks or bring a track together, and limiting to set a suitable final level. It may also include adjusting stereo balance, removing unwanted low-end rumble, checking phase and setting clean starts, fades and gaps between songs.

The word subtle matters. A mastering engineer cannot truly repair a vocal that is buried, a snare that is painfully sharp, or a bass part that disappears on smaller speakers. Those are mix decisions. Mastering can improve the overall picture, but it should not be asked to rebuild it.

For a single, the focus is often impact and translation. For an EP or album, sequencing becomes part of the craft too. One song may be naturally darker or quieter than the next, but the collection should still feel intentional rather than like it was assembled from unrelated sessions.

Why loud is not always better

It is easy to judge a new master by which version sounds louder. Our ears tend to interpret louder as better for a moment, especially when comparing two versions back to back. But excessive level can come at a cost: crushed drums, harsh cymbals, smeared bass and a chorus that has nowhere left to grow.

Streaming services also apply their own loudness handling. There is no reliable advantage in forcing every track to the absolute ceiling, and there is plenty to lose if heavy limiting damages the mix before it ever reaches a platform. A good master has enough level for its genre while keeping the musical movement intact.

That balance depends on the song. A dense electronic track, a punk single and a quiet acoustic performance do not need the same treatment. The goal is not to chase a universal loudness number. It is to make choices that serve the arrangement, the genre and the way people are likely to hear it.

A useful question is: does the track still feel alive when the chorus arrives? If the answer is no, more level is unlikely to be the solution.

The mix you send determines the result

The most productive mastering sessions begin before the export. Leave headroom in the mix rather than driving the master output into clipping. A clean 24-bit WAV or AIFF export at the project sample rate is normally a sensible starting point. Avoid converting sample rates repeatedly, and do not send an MP3 as the source unless there is genuinely no alternative.

It is also worth removing any loudness maximiser from the mix bus if it is only there to make rough mixes feel competitive. If that processing is part of the sound, such as deliberate saturation or a compressor shaping the groove, keep it on and provide a second unprocessed version for comparison. Context helps the engineer understand what is creative choice and what is temporary volume.

Before approving the mix, listen somewhere less flattering than your studio monitors. Try headphones, a car, a small Bluetooth speaker and low volume. You are not trying to make every device sound identical. You are looking for problems that repeat: a vocal that vanishes, low end that swamps the chorus, a hi-hat that becomes abrasive or an intro that feels too quiet to draw people in.

Give useful notes, but do not prescribe a chain of plugins. “Keep the kick weighty without making the bass cloudy” is a helpful creative instruction. “Add 2 dB at a particular frequency” may be right, but it can also distract from the actual outcome you want.

When a revision is the right call

A strong mastering engineer will sometimes say that a mix needs attention before it can be finished properly. That is not a failure. It is a chance to solve the issue at the stage where it can genuinely be solved.

Common reasons to revisit a mix include severe sibilance on a lead vocal, distortion on individual channels, an unstable low end, over-compression, or a limiter already flattening transients. If the problem appears only at a particular moment, a revised mix or stem can be far more transparent than trying to force a broad fix across the whole track.

Stem mastering can be useful when a small number of groups need independent control, perhaps vocals, drums, music and effects. It offers more flexibility than a stereo master, but it is not a substitute for completing the mix. More control also means more opportunities to change relationships that were working, so it should be used when there is a clear reason.

Preparing a release without last-minute chaos

The practical details matter, especially when several people are involved. Clearly named files save time and avoid the classic mistake of approving the wrong version. Include the artist name, track title, mix version and sample rate where useful. If there are clean and explicit versions, instrumentals, radio edits or alternate mixes, label them so no one has to guess.

For an EP or album, send the intended running order and say whether the gaps between tracks are deliberate. A breath between songs can be part of the pacing. So can a hard cut. If one track flows directly into another, provide them exactly as intended and flag the transition before work begins.

You should also decide what deliverables you need. A release might require a high-resolution master for distribution, a version for video, an instrumental, and a performance backing track. These may not all need the same final format or level. Planning that early prevents a scramble on release week.

Where physical formats are involved, ask about the specific requirements before final approval. Vinyl, for example, has different practical limitations from digital distribution. Long sides, extreme low-end width and aggressive high frequencies can all affect what is sensible. The best approach is not to make one format imitate another, but to prepare each version with its destination in mind.

A better way to judge the finished master

Do not assess a master only through the same speakers and at the same volume used during mixing. Live with it for a day if your schedule allows. Hear it on the walk to the station, in the kitchen, in the car and at low level late at night. Notice whether the vocal remains communicative, whether the bass supports rather than dominates, and whether the song still invites another listen.

Compare it to references from a similar musical world, but use that comparison carefully. A reference can reveal that your mix is unusually dark, narrow or bass-heavy. It should not pressure you into copying someone else’s identity. The point is confidence in translation, not conformity.

At Yougig, a mastering conversation can sit alongside recording, mixing and live performance capture, which is useful when the people finishing the release understand how it was made. Whether you arrive with a complete mix or need to step back and refine one section first, the aim is the same: a record that feels like you, only ready to meet the world beyond the room.

Keep the final decision tied to the song rather than the meter. If the master makes the lyric clearer, the groove more convincing and the emotional turn of the arrangement easier to feel, it is doing the work that matters.